Swivel Connect
Contacts
Search Contacts
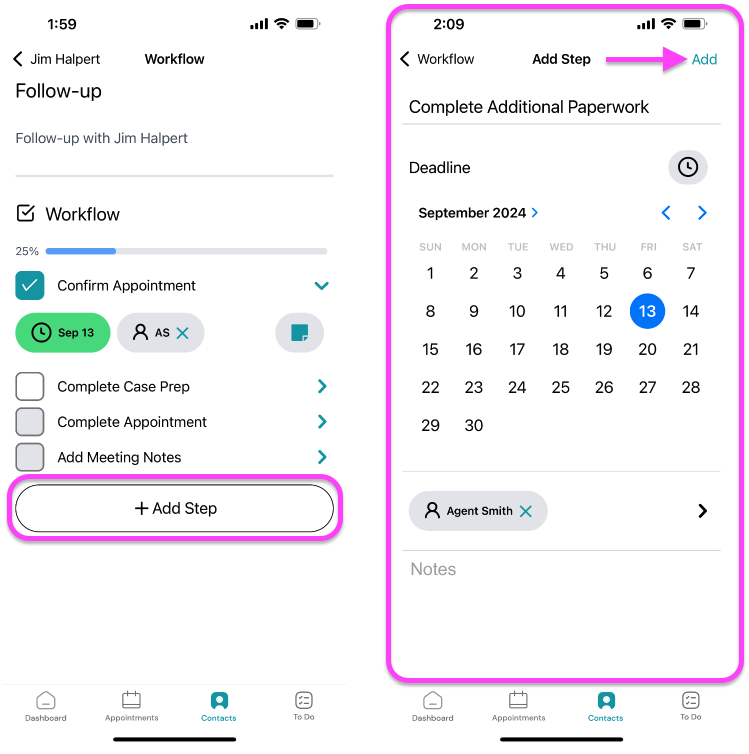
Section titled “Search Contacts”View all of your contacts by tapping the Contacts icon on the bottom menu bar. Find a specific contact by tapping the Search bar, then typing the name.
View Contact
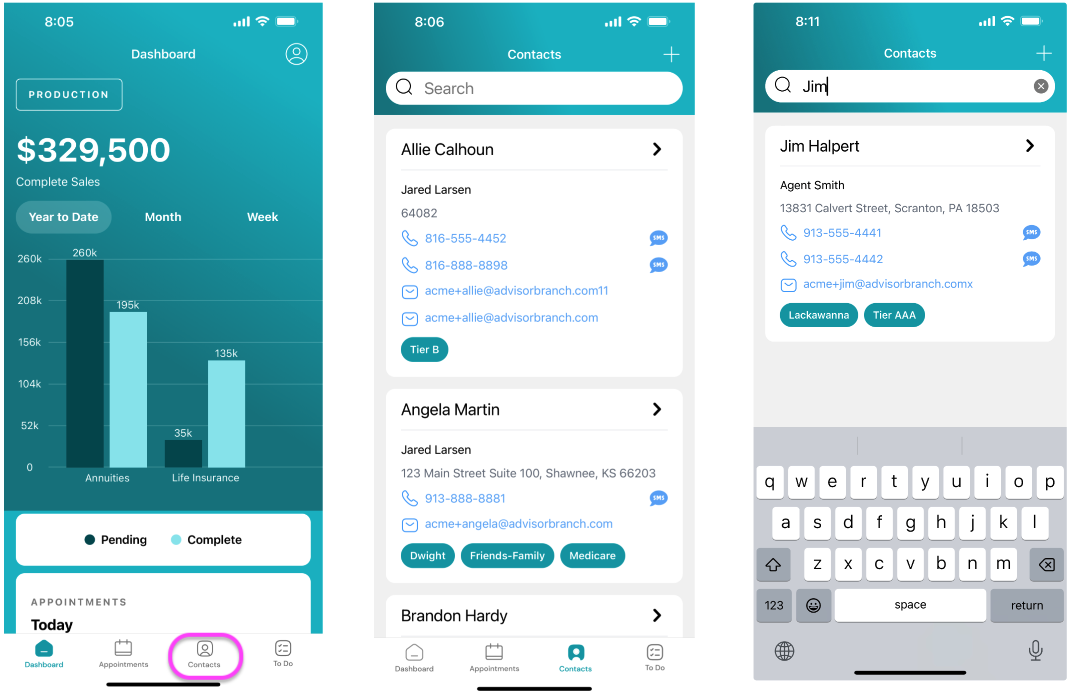
Section titled “View Contact”Navigate to a contact record to view more details by tapping the right arrow.
Create & Edit Contacts
Section titled “Create & Edit Contacts”Create Contact
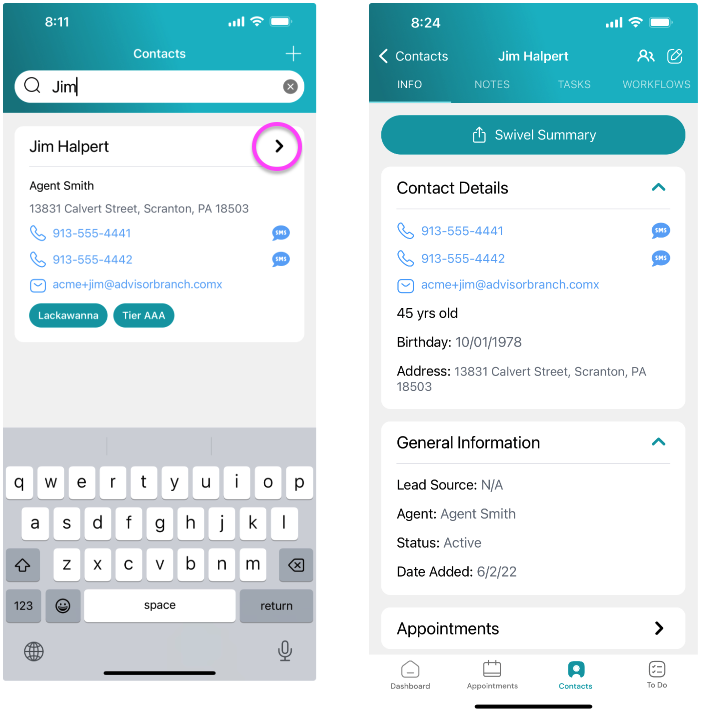
Section titled “Create Contact”Create a new contact by tapping the plus + icon and selecting the contact type. After you’re finished providing your appointment details on the New Appointment form, tap Add.
Edit Contact Details and General Information
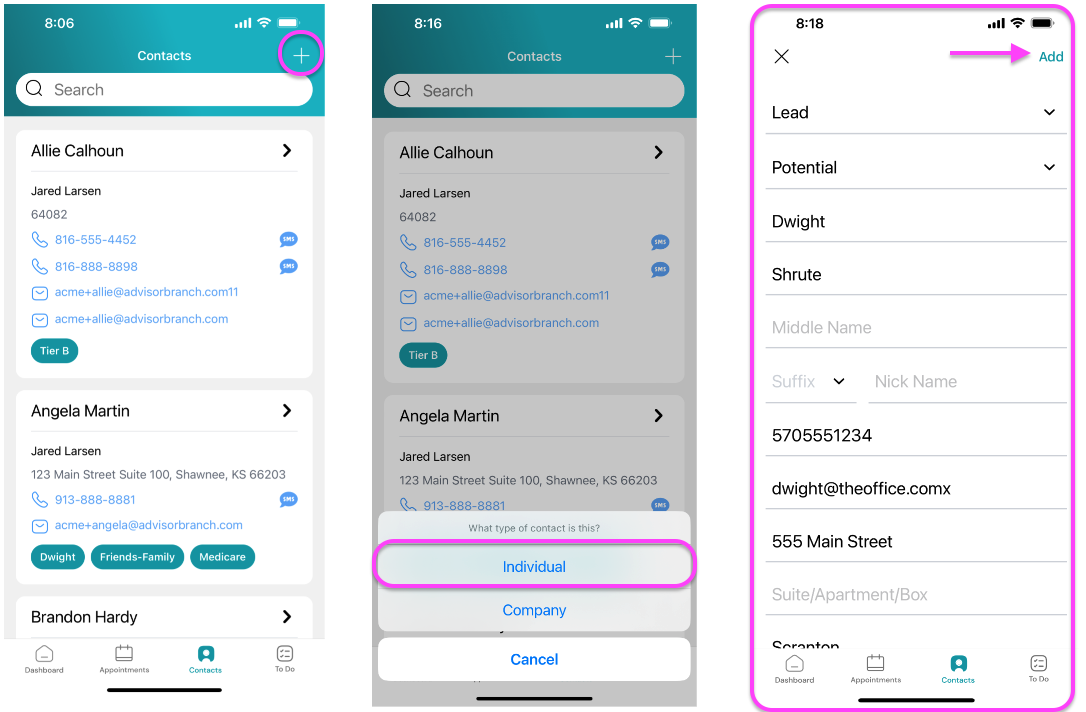
Section titled “Edit Contact Details and General Information”Edit a contact by tapping the Edit icon. Once you’re finished updating the appointment details, tap Update.
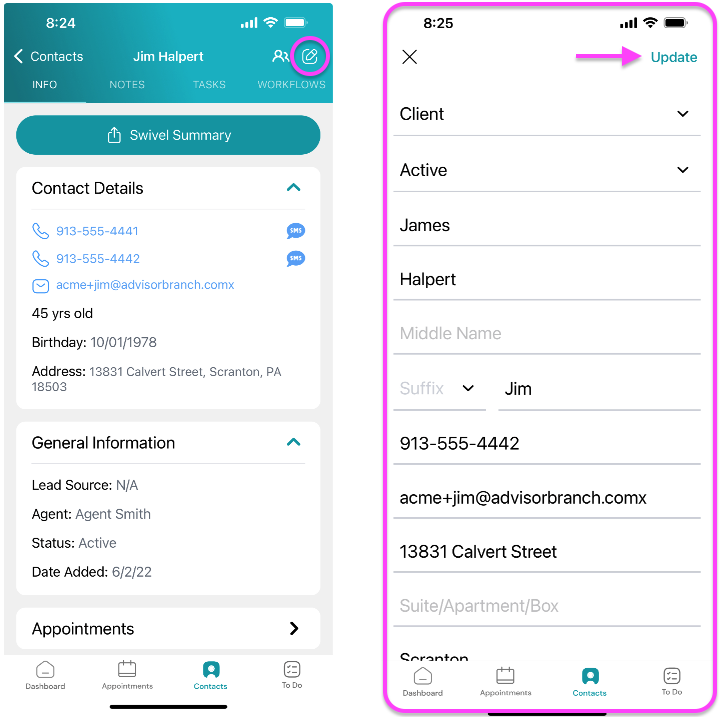
Contact Info
Section titled “Contact Info”View Associations
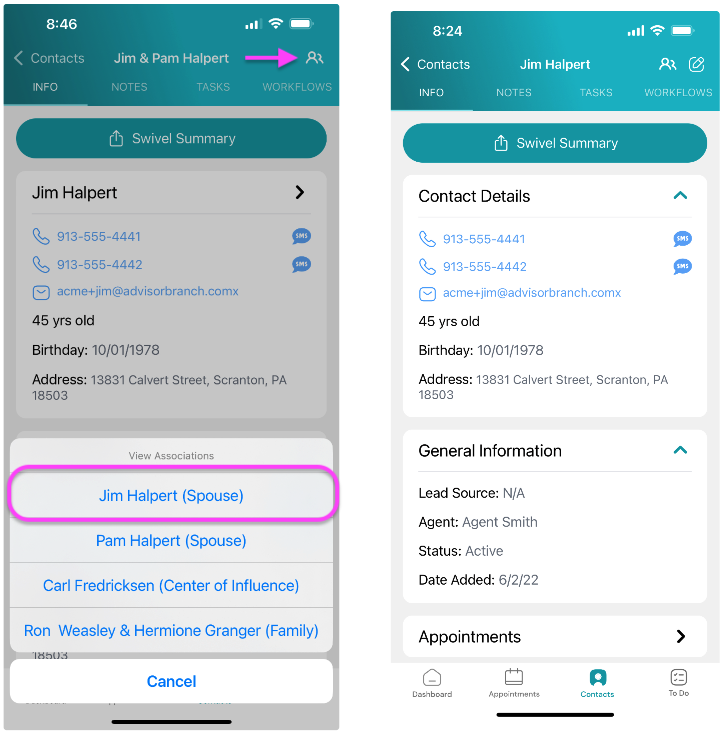
Section titled “View Associations”View a contact’s relationships by tapping the Associations icon and select a record to view.
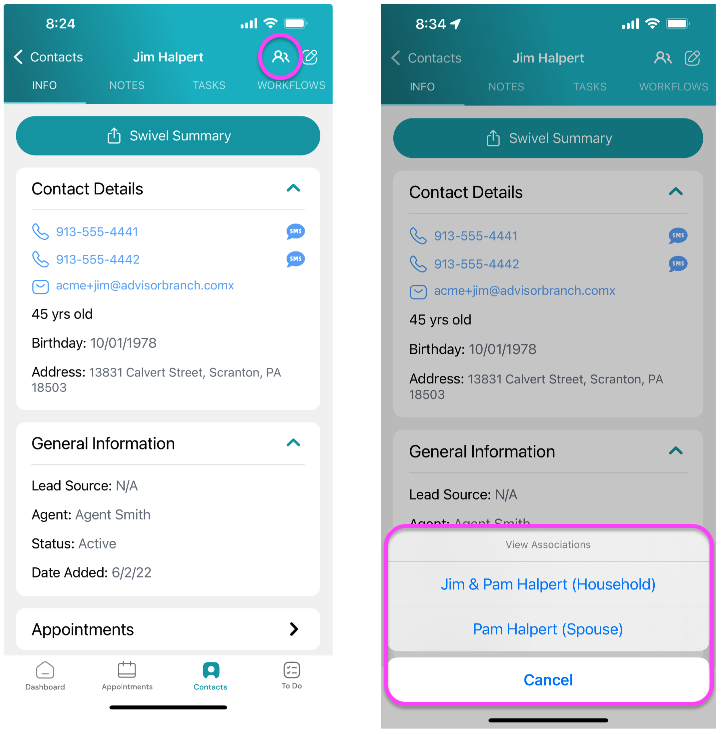
View Associations: Household
Section titled “View Associations: Household”To navigate to a household view for a given contact, select the option with Household.
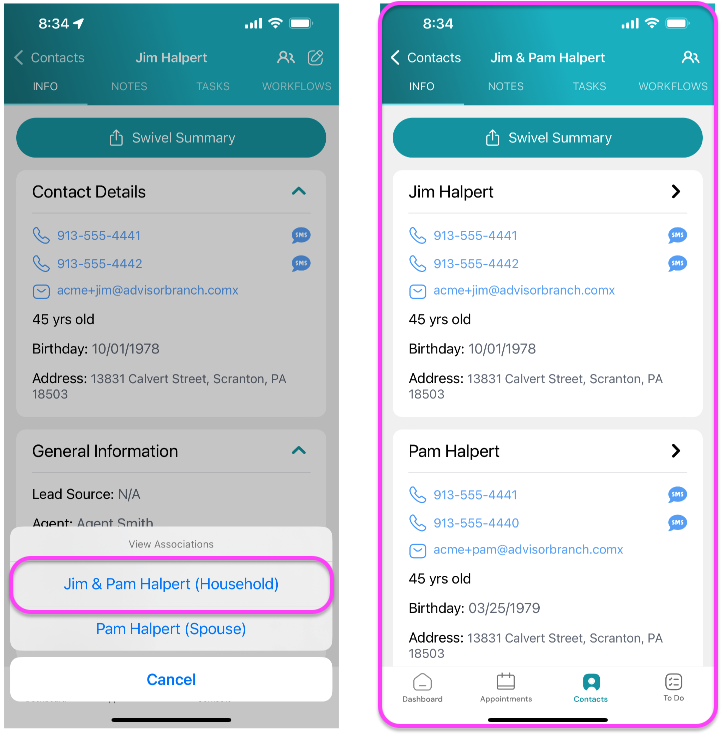
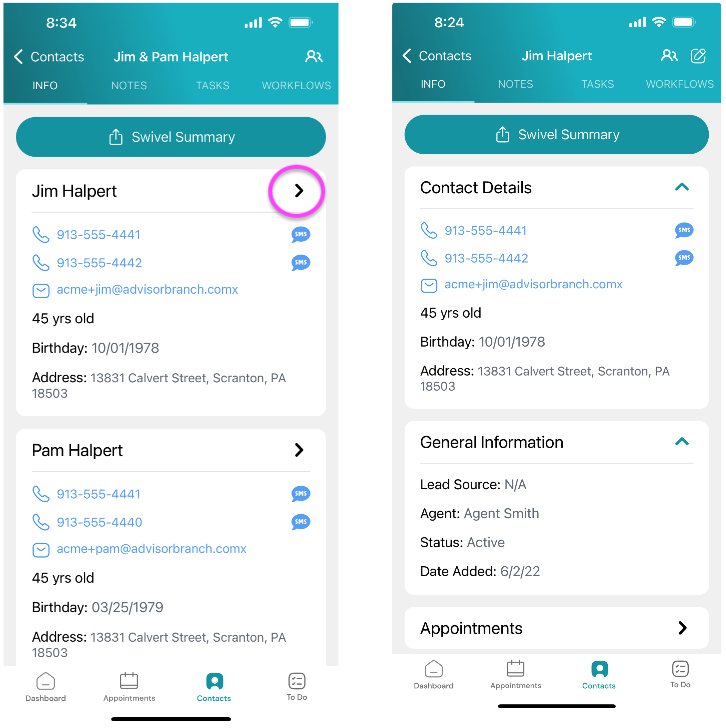
To navigate back to the individual contact you can (1) tap the arrow on the contact card or (2) tap the Associations icon and select the contact record.
View & Share Swivel Summary
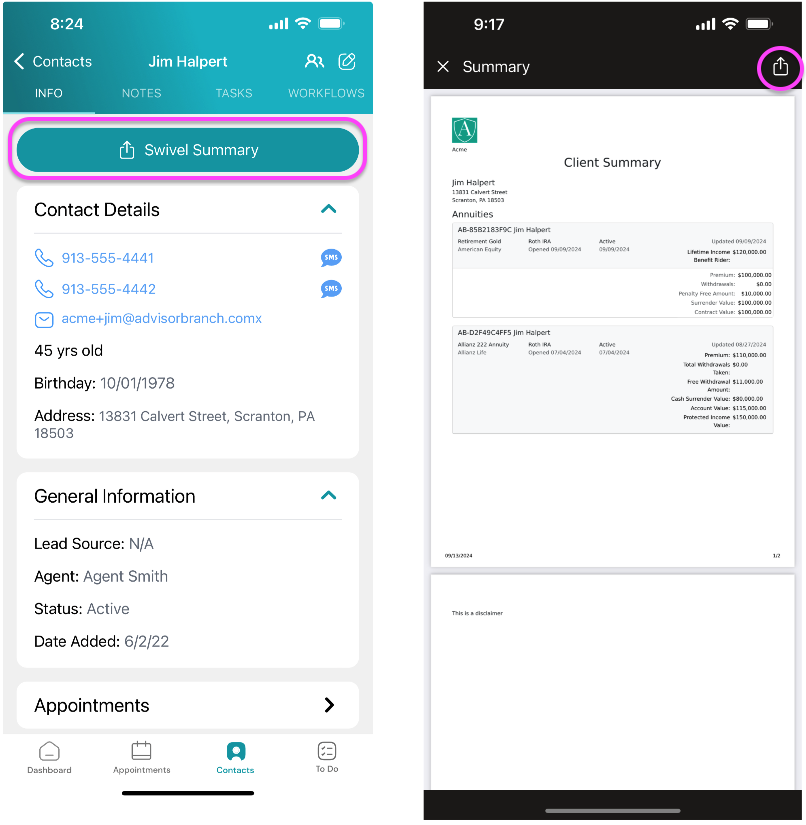
Section titled “View & Share Swivel Summary”Tap the Swivel Summary button to easily share and send a summary of your clients’ portfolio directly.
Appointments
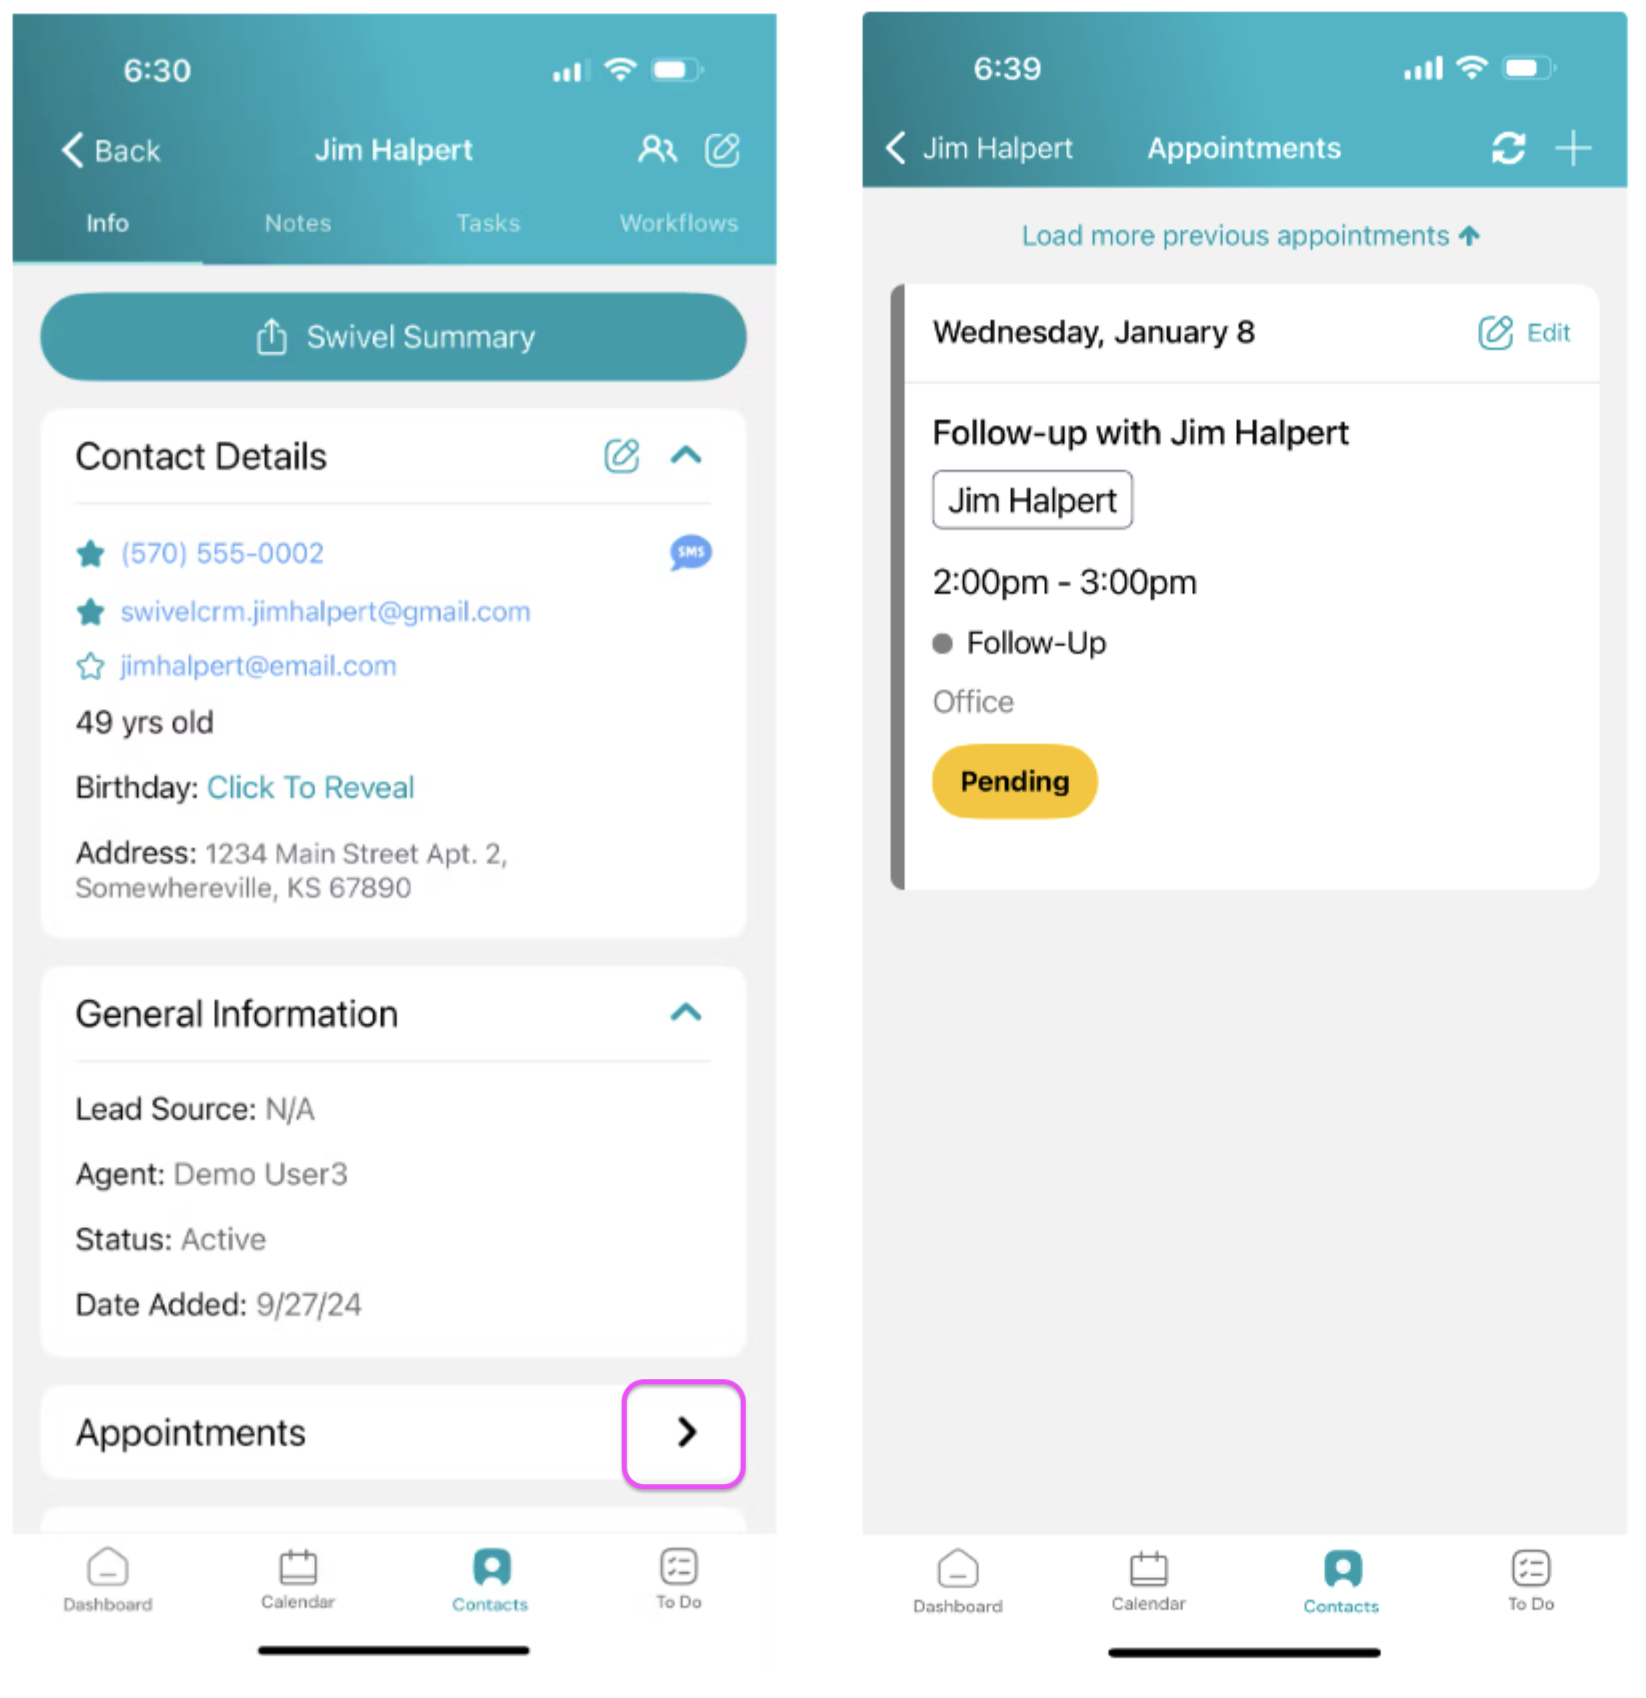
Section titled “Appointments”View and manage appointments for a given contact by tapping Appointments.
Products
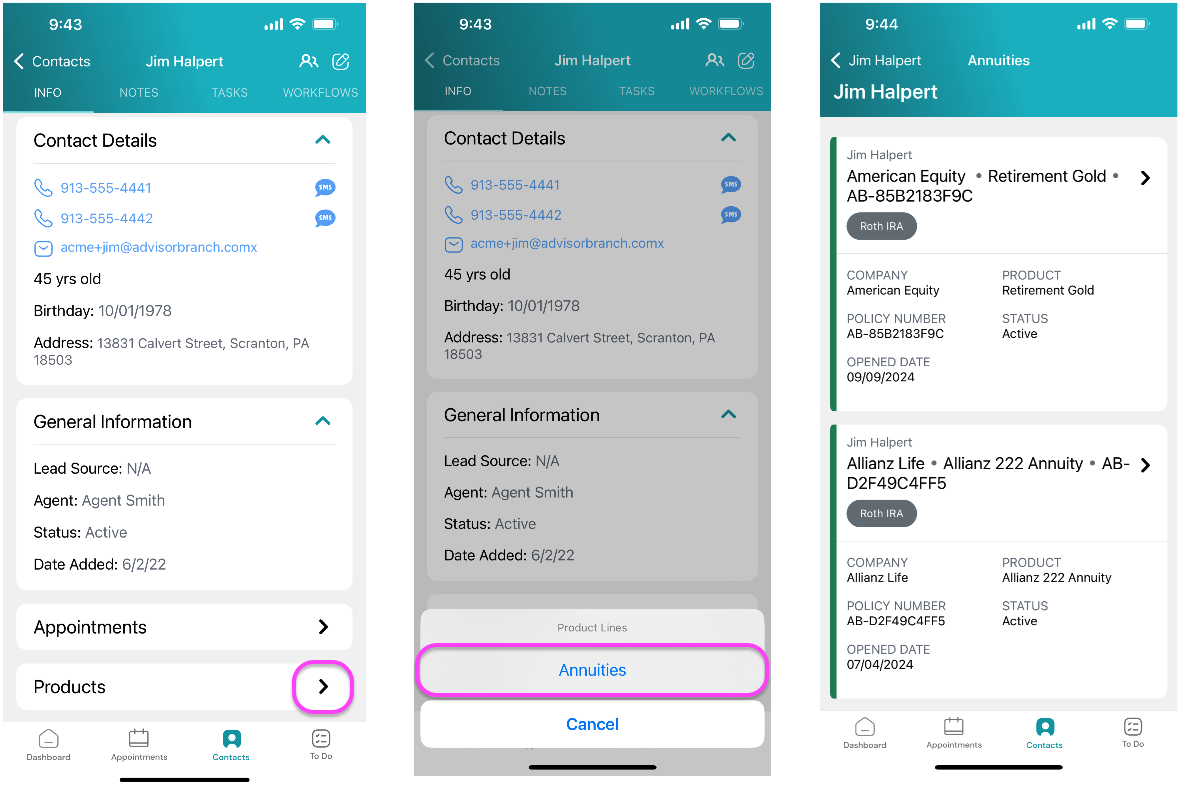
Section titled “Products”View and manage policies and accounts for a given contact by tapping Products and selecting the product line to view respective accounts and policies.
View & Manage Notes
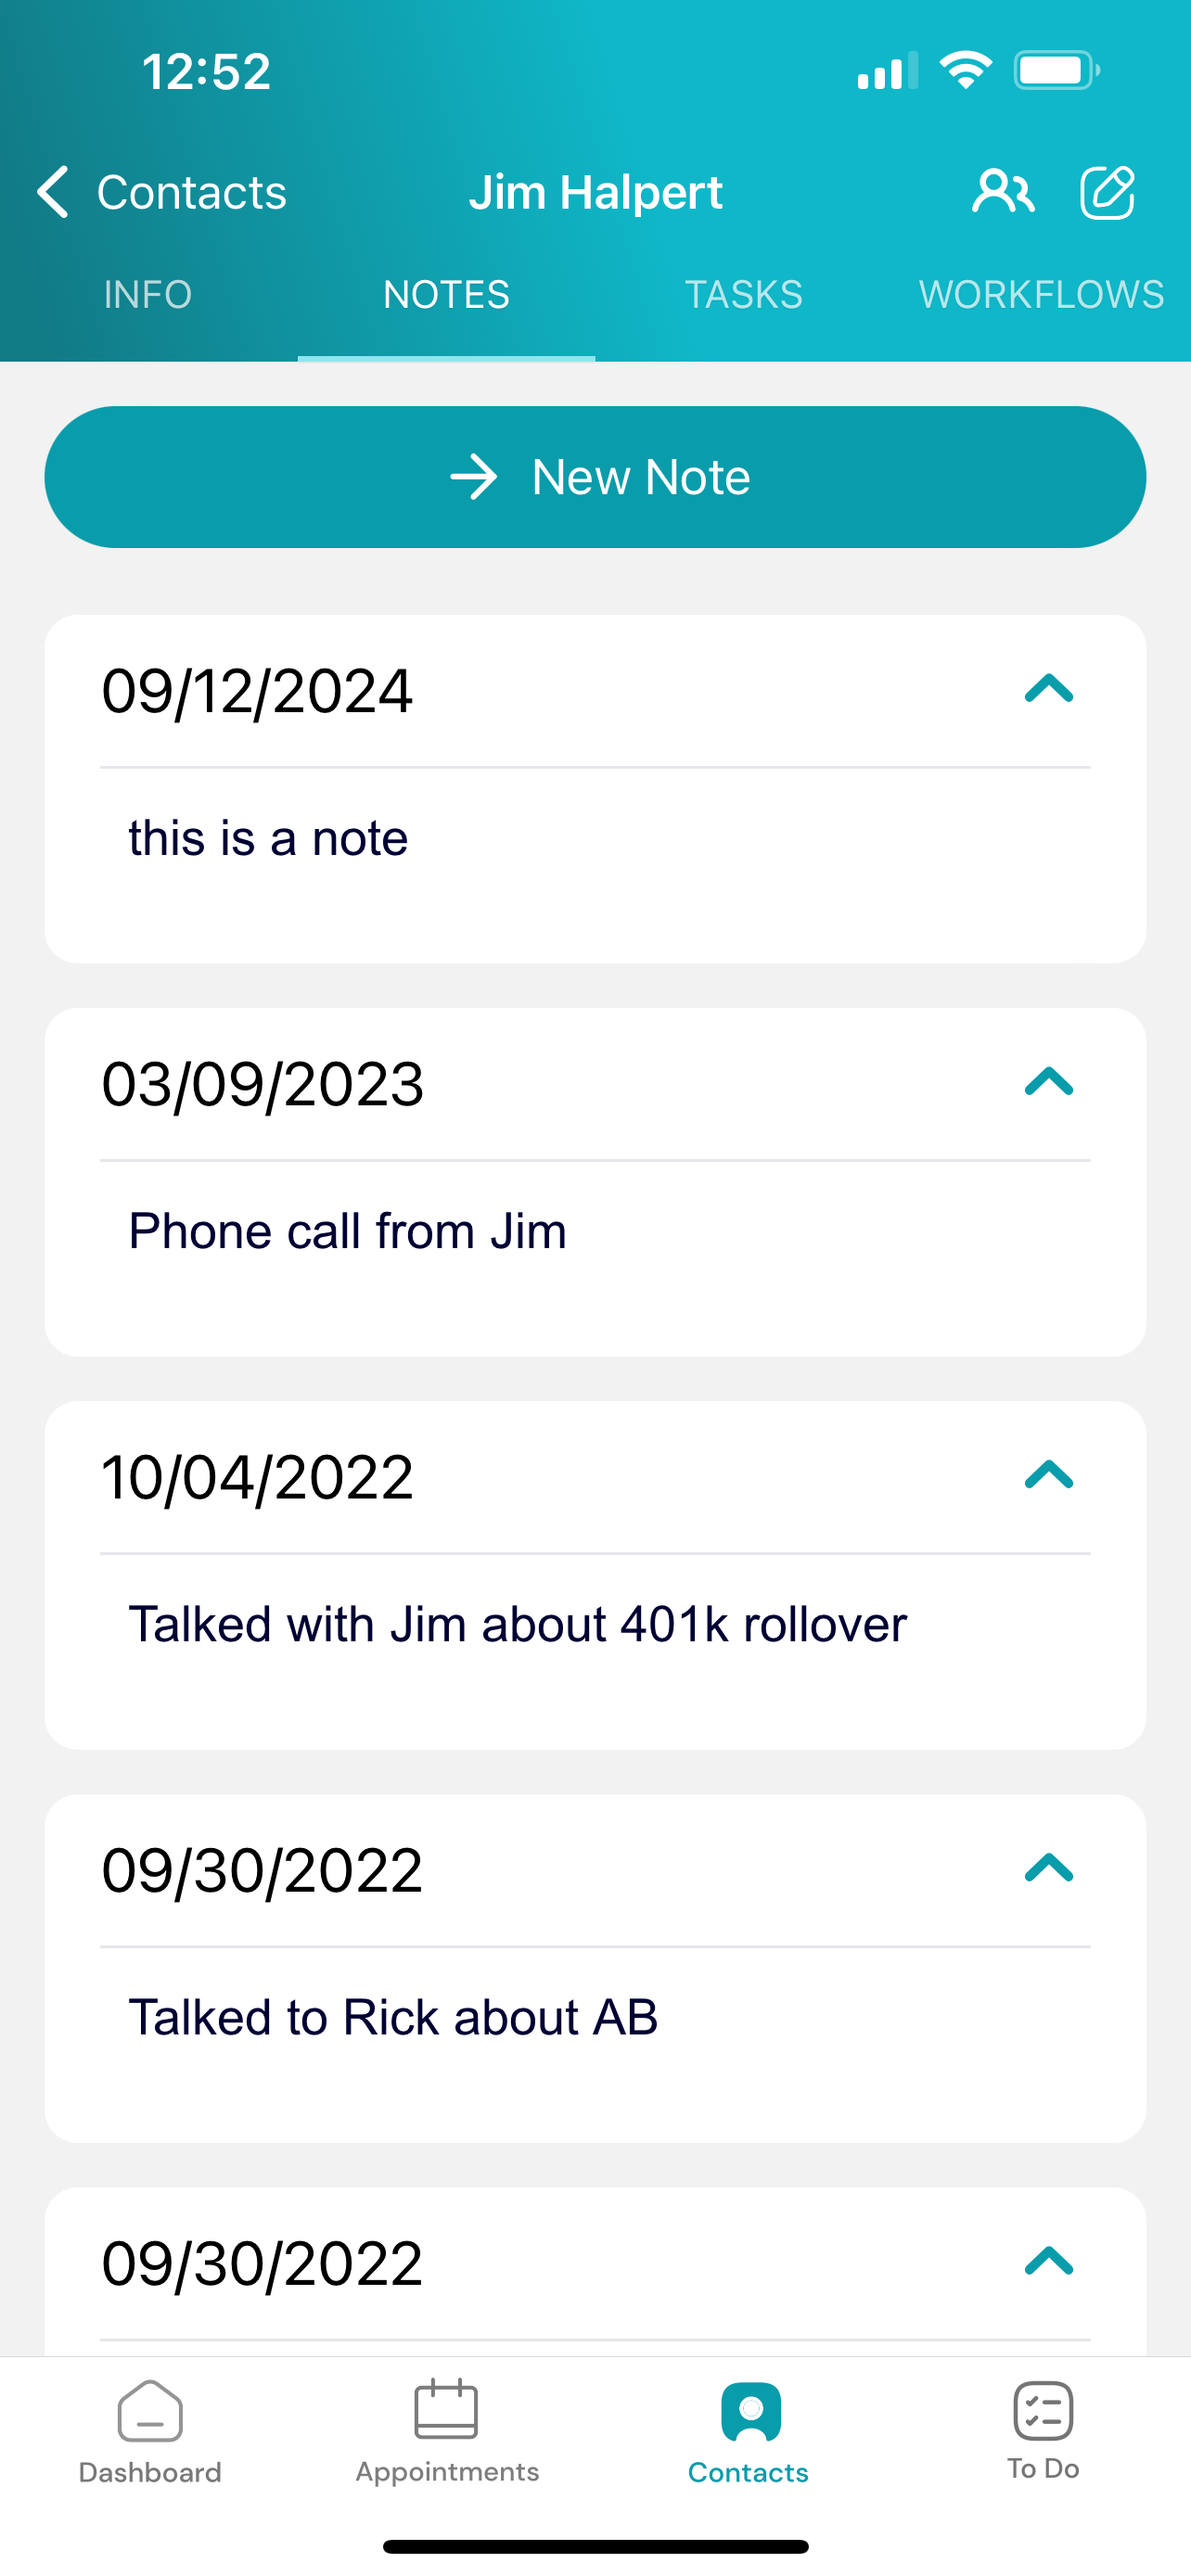
Section titled “View & Manage Notes”View and manage notes for a given contact by tapping the Notes tab.
Add Note
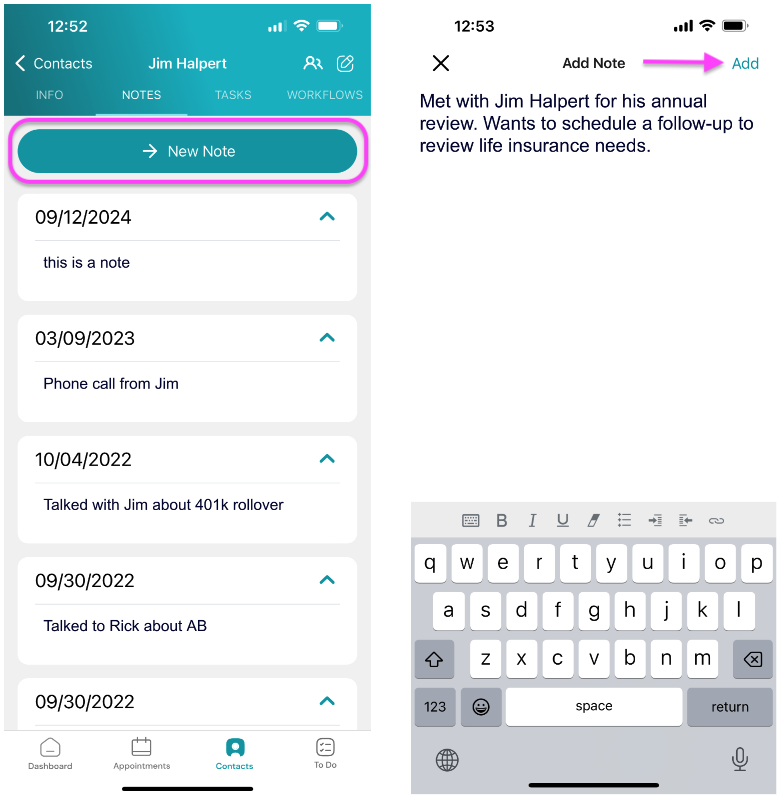
Section titled “Add Note”To add a note, tap the New Note button. Once you’re finished recording a note, tap Add.
Edit and Delete Note
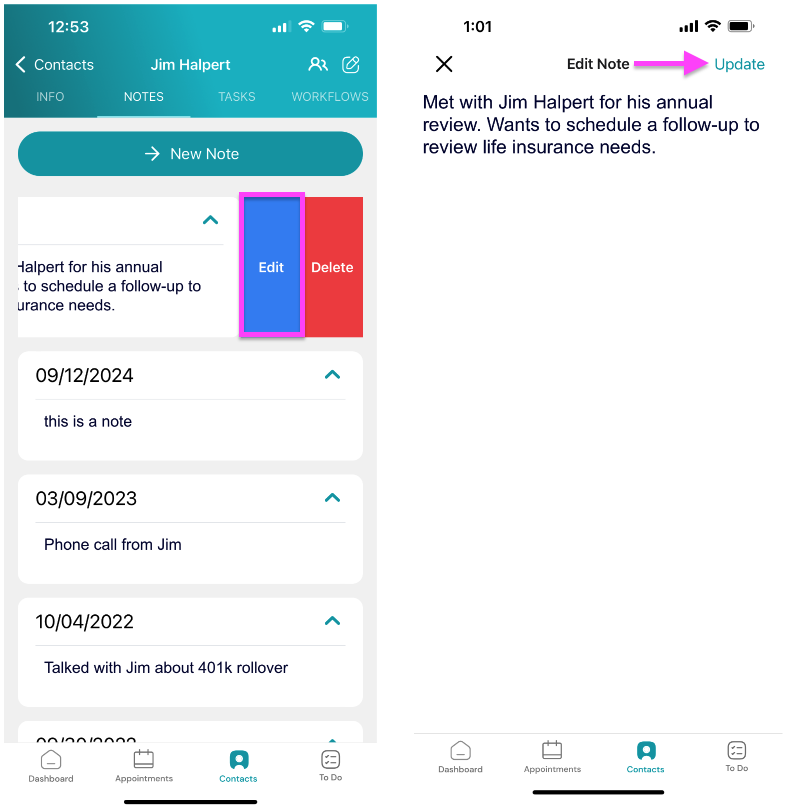
Section titled “Edit and Delete Note”To edit a note, slide left and tap the Edit button. Once you’re finished recording a note, tap Update. To delete a note, slide left and tap the Delete button.
View & Manage Tasks
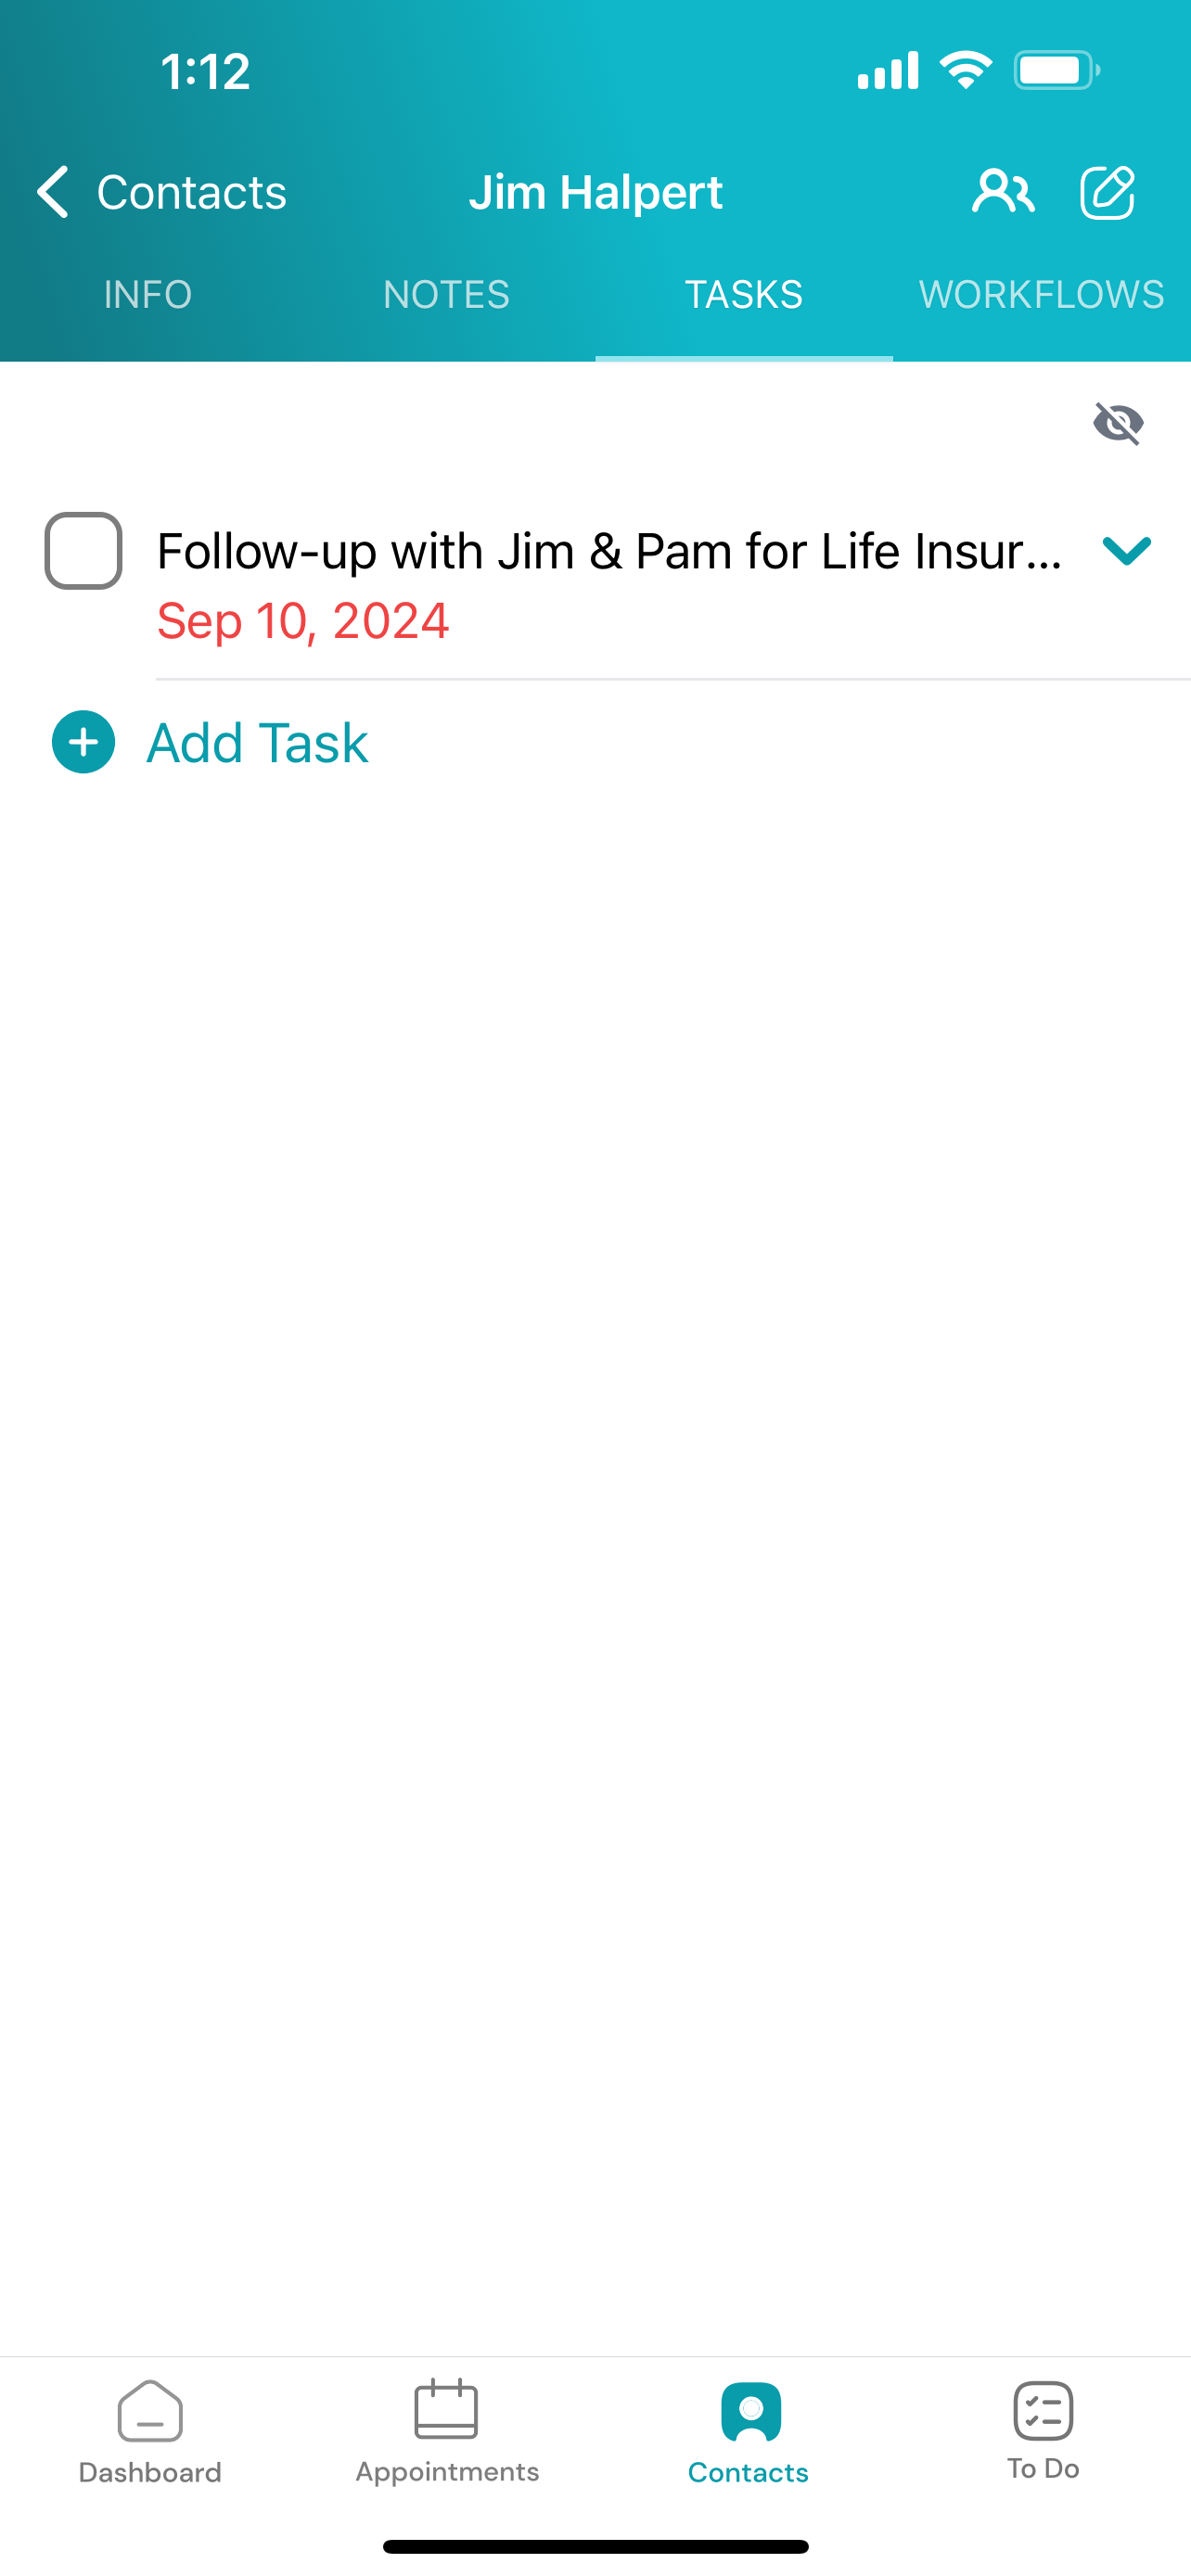
Section titled “View & Manage Tasks”View and manage tasks for a given contact by tapping the Tasks tab.
Add Task
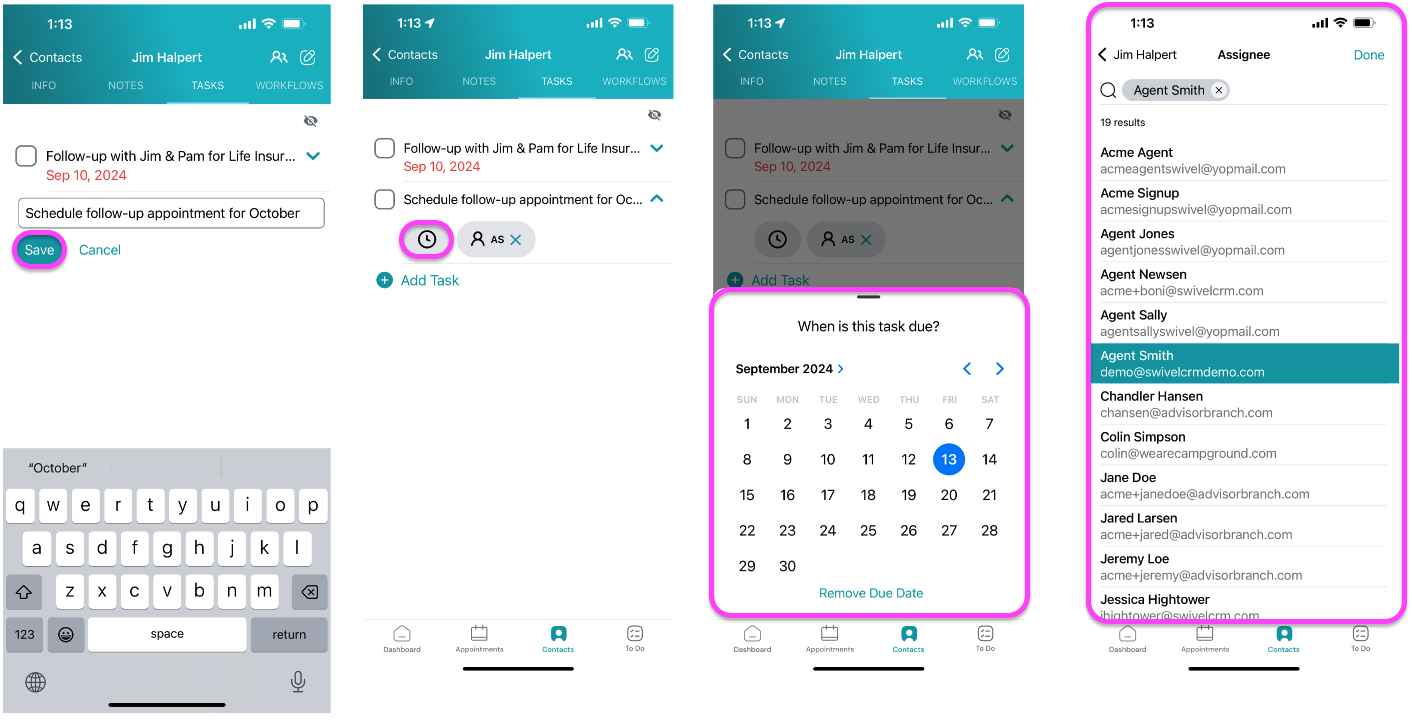
Section titled “Add Task”To add a task, tap the +Add Task button. Once you’re finished recording a note, tap Save.
To set a due date and assignee, tap the down arrow to expand for more details.
- Tap the Due Date button to set a deadline.
- Tap the Assignee button to assign a user.
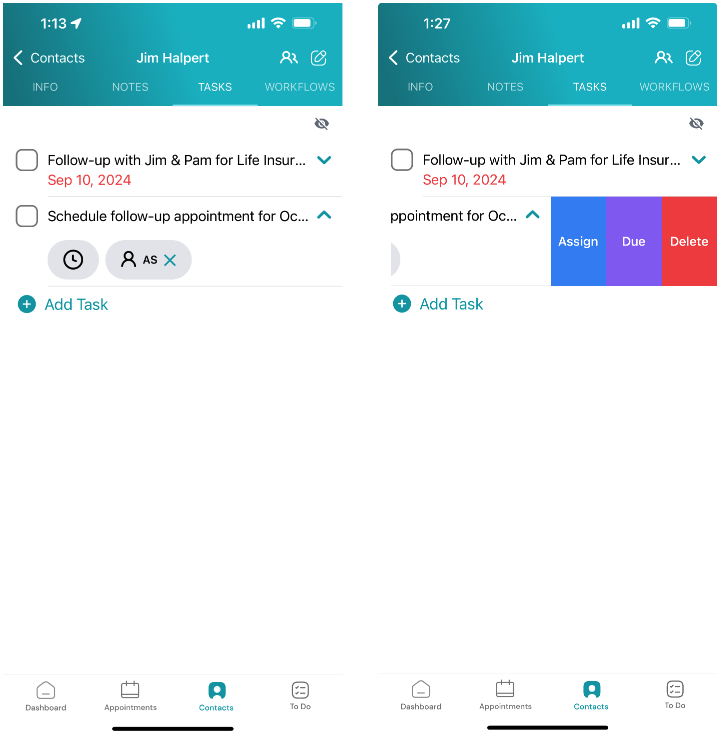
You can also manage the due date and assigning by sliding left and tapping the Assign, Due or Delete buttons.
Workflows
Section titled “Workflows”View & Manage Workflows
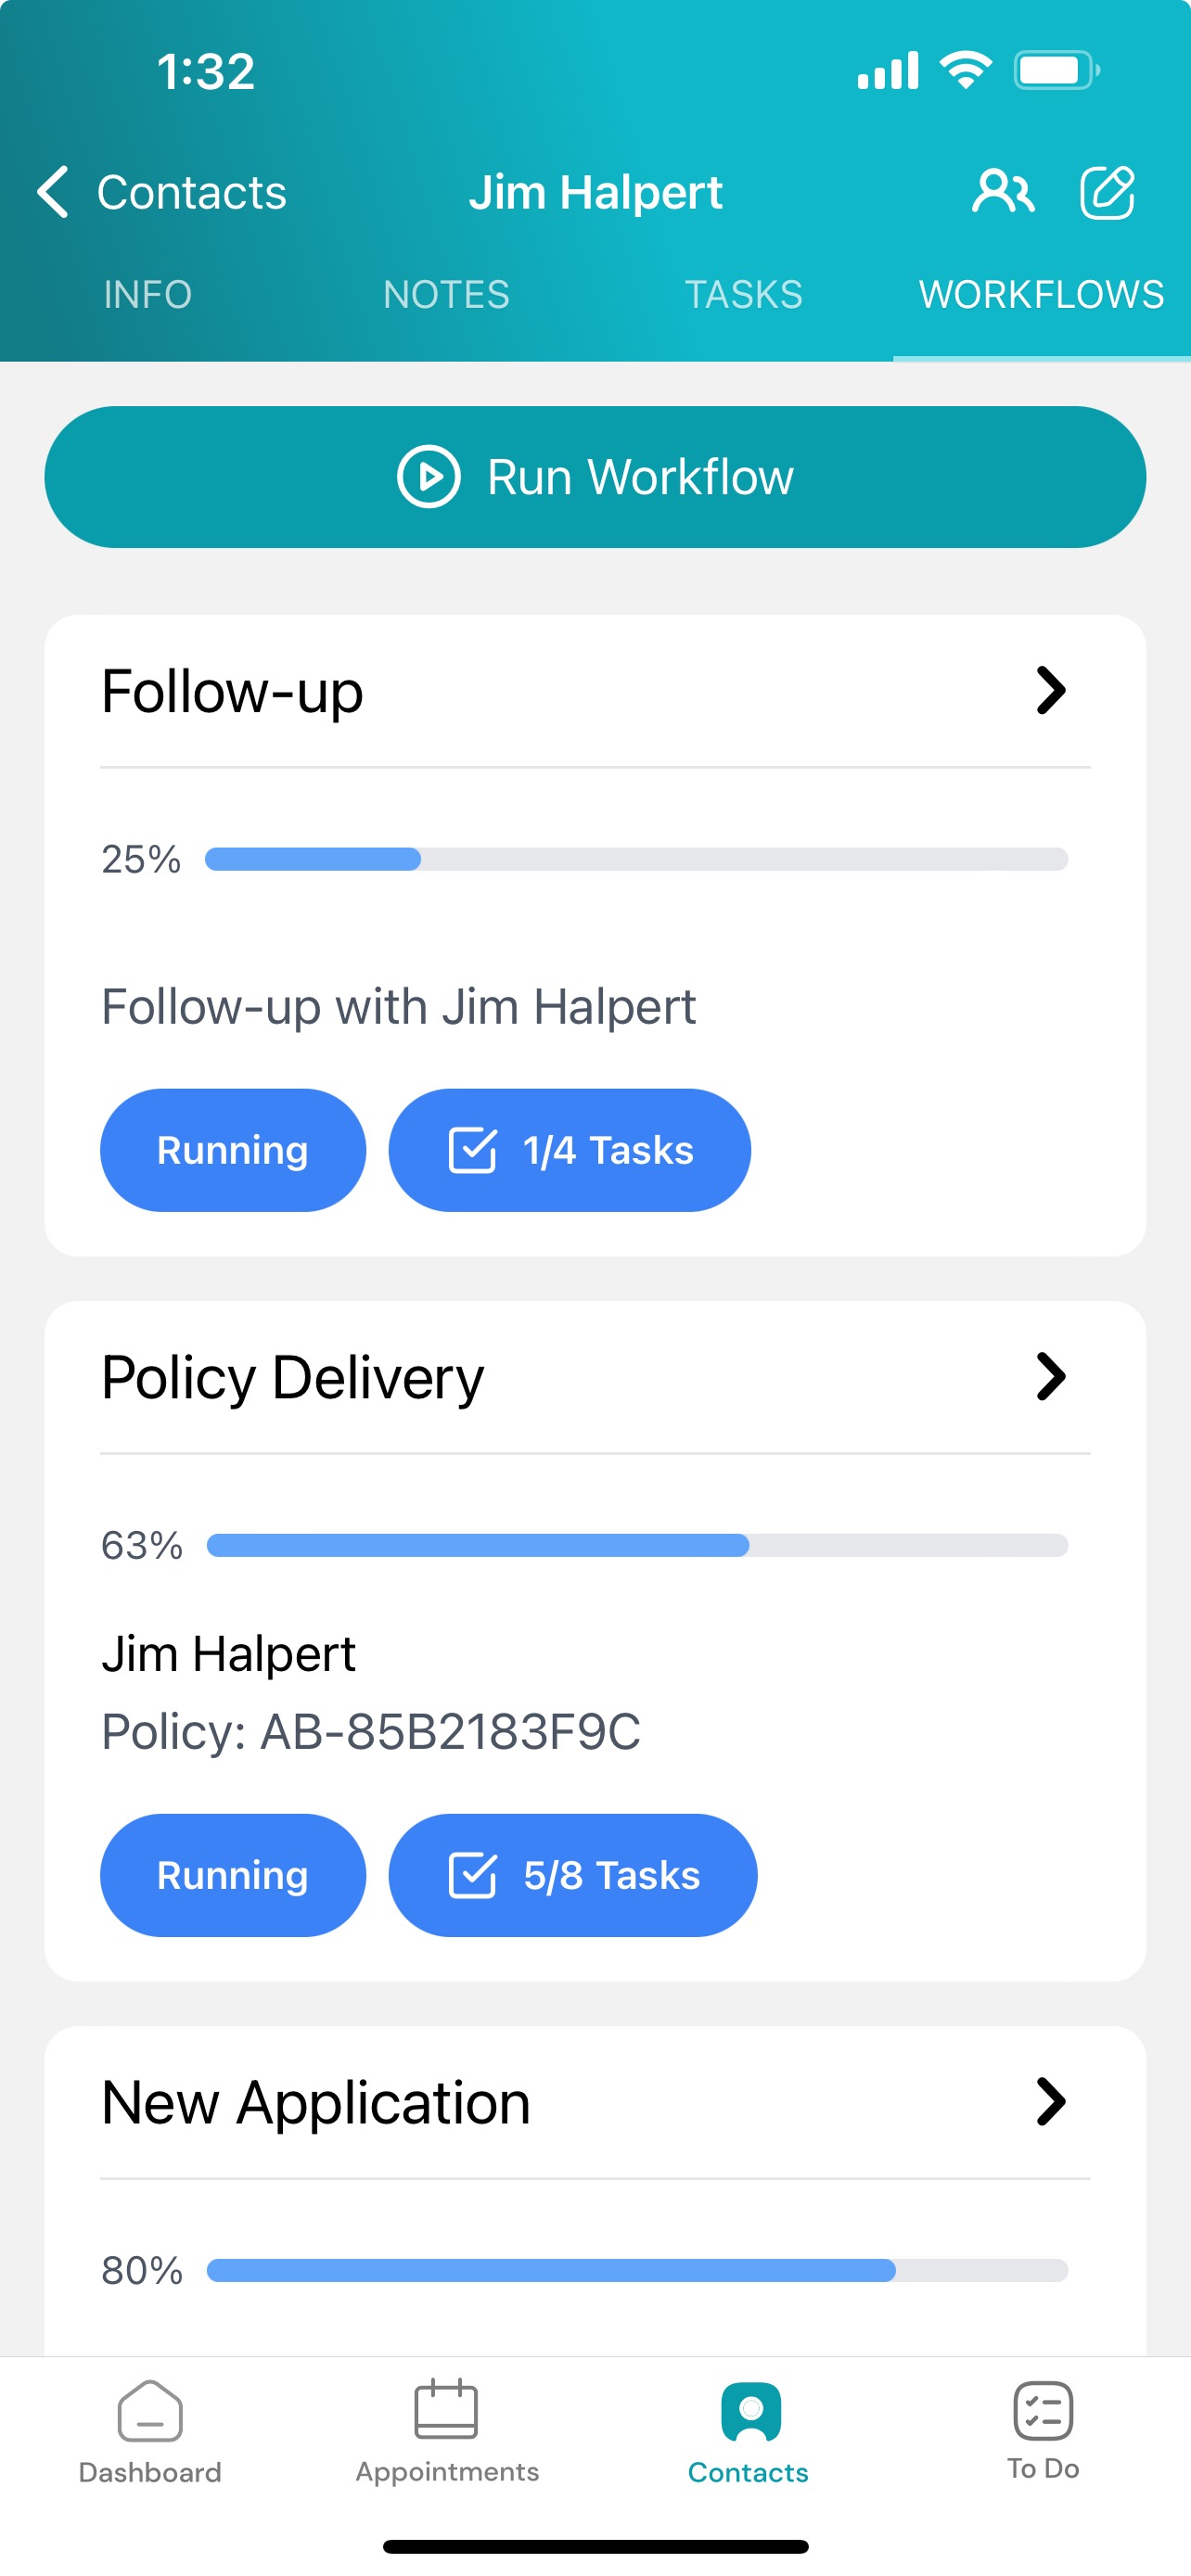
Section titled “View & Manage Workflows”View and manage workflows for a given contact by tapping the Workflows tab.
Run Workflows
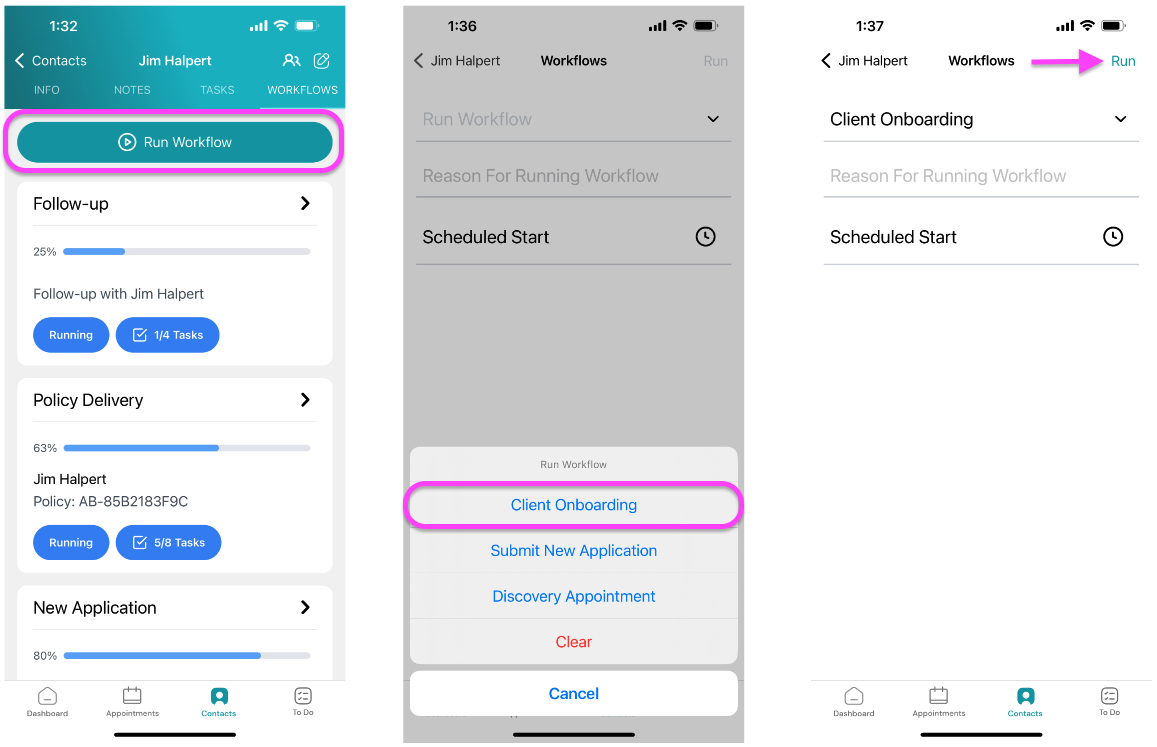
Section titled “Run Workflows”To start a workflow, tap the Run Workflow button. Select a workflow and tap Run.
Update Workflows
Section titled “Update Workflows”View Workflow Steps
Section titled “View Workflow Steps”To make updates to a running workflow, tap the arrow to view and manage the workflow steps.
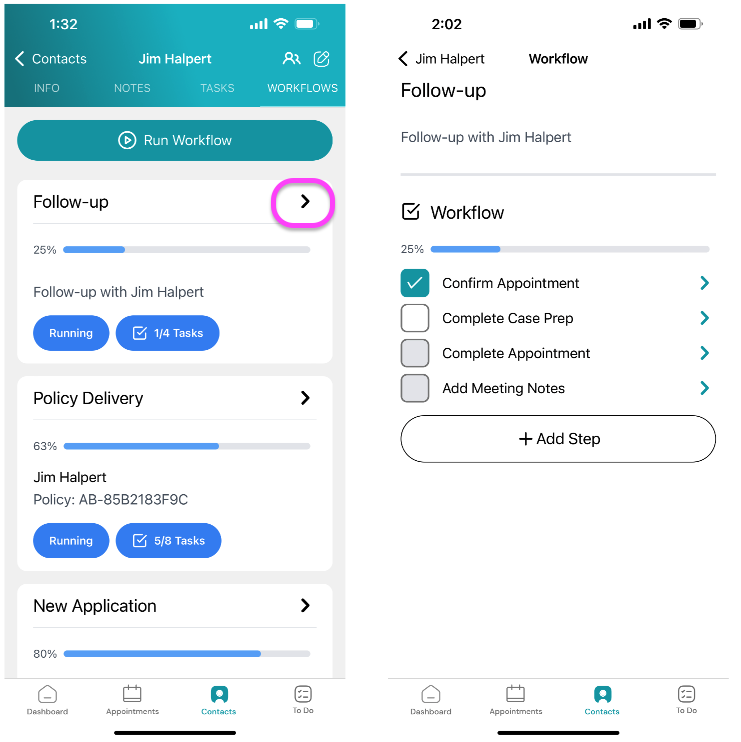
Manage Workflow Step
Section titled “Manage Workflow Step”To mark a step complete, tap the empty checkbox. To manage due dates, assignees and add workflow step notes, tap the arrow.
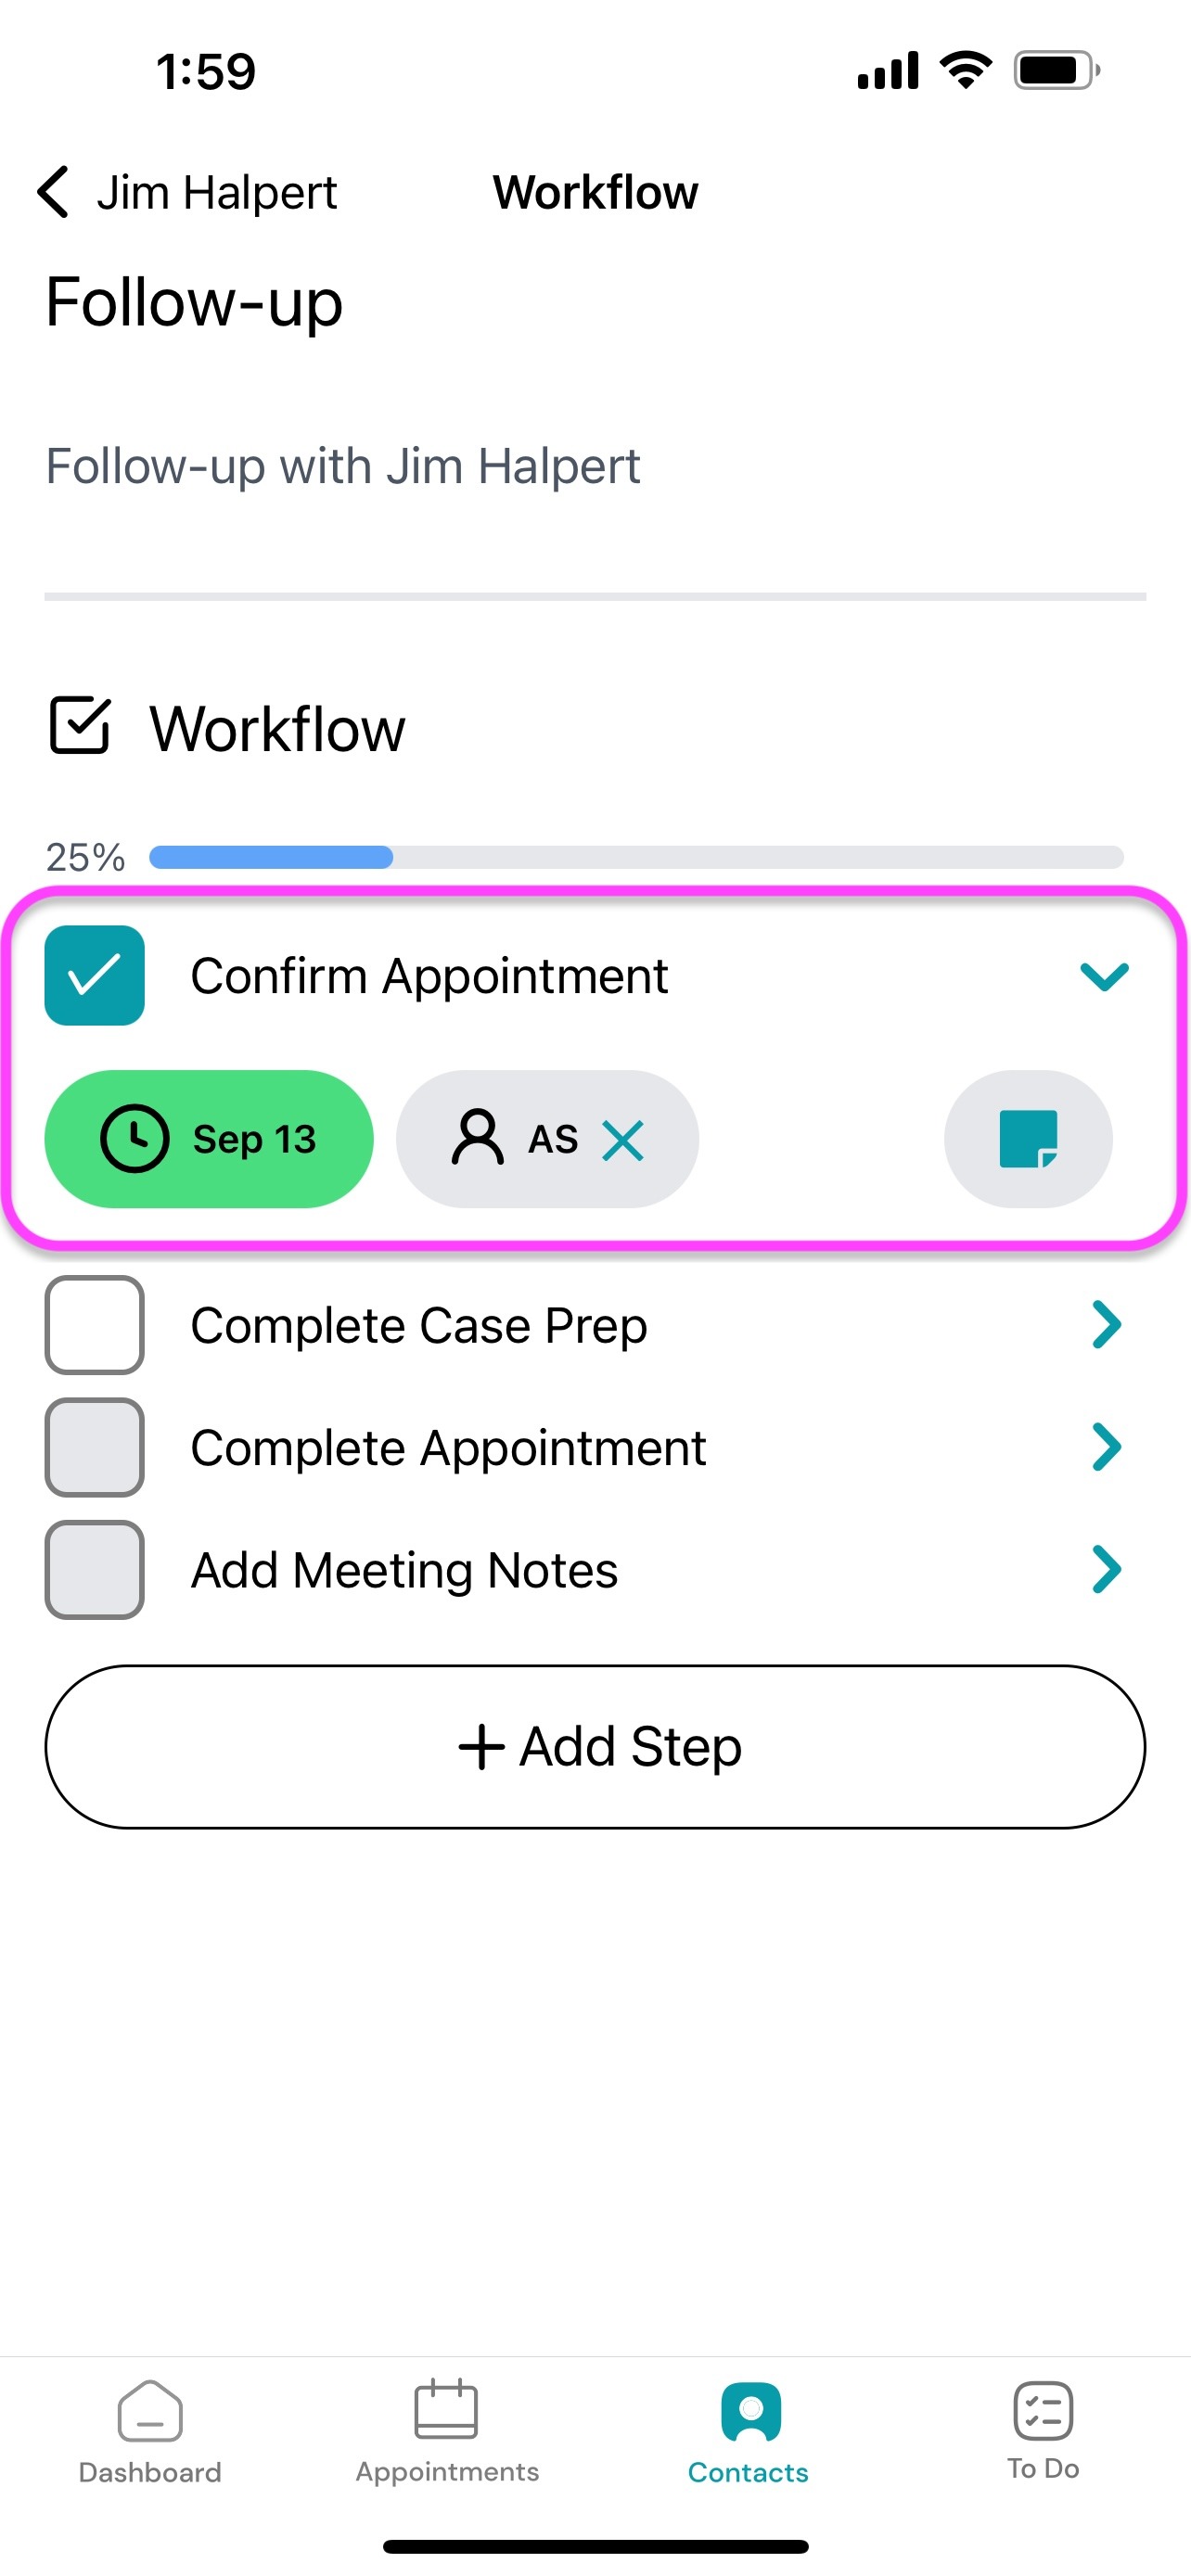
Add Workflow Step
Section titled “Add Workflow Step”To add a new workflow step, tap the +Add Step button. Once you’re finished adding workflow step details, tap Add.