

Document Storage
Drag & Drop Client Files and Folders
Users have the ability to search their computer to upload a file or can drag and drop a file or folder directly from their computer into Swivel wherever they would like to store these documents (Contacts, Products, Marketing Campaigns & Events, and Business Management).
Once uploaded to Swivel, documents are sorted by the Document Date. If multiple documents have the same Document Date, then they are sorted by Name.
Adding a Document in Swivel
Section titled “Adding a Document in Swivel”- Navigate to the Documents section you would like to upload a document, for example, navigate to a contact and to the Documents accordion.
- Select +New Document and select from configured document types.
- Add a Name, Description, Date, and Tags
- Select in the Window that says “Choose a file of drag it here” to browse your computer for your document. Or drag your desired document right to this square.
- Select Save.
Creating a New Folder in Swivel
Section titled “Creating a New Folder in Swivel”- Navigate to the Documents section you would like to upload a document, for example, navigate to a contact and to the Documents accordion.
- Select +New Folder
- Add a Name (Required), Description, and Tags if applicable
- Select Save.
Drag and Drop Files and Folders
Section titled “Drag and Drop Files and Folders”- Navigate to the Documents section you would like to upload a document, for example, navigate to a contact and to the Documents accordion.
- Expand the accordion.
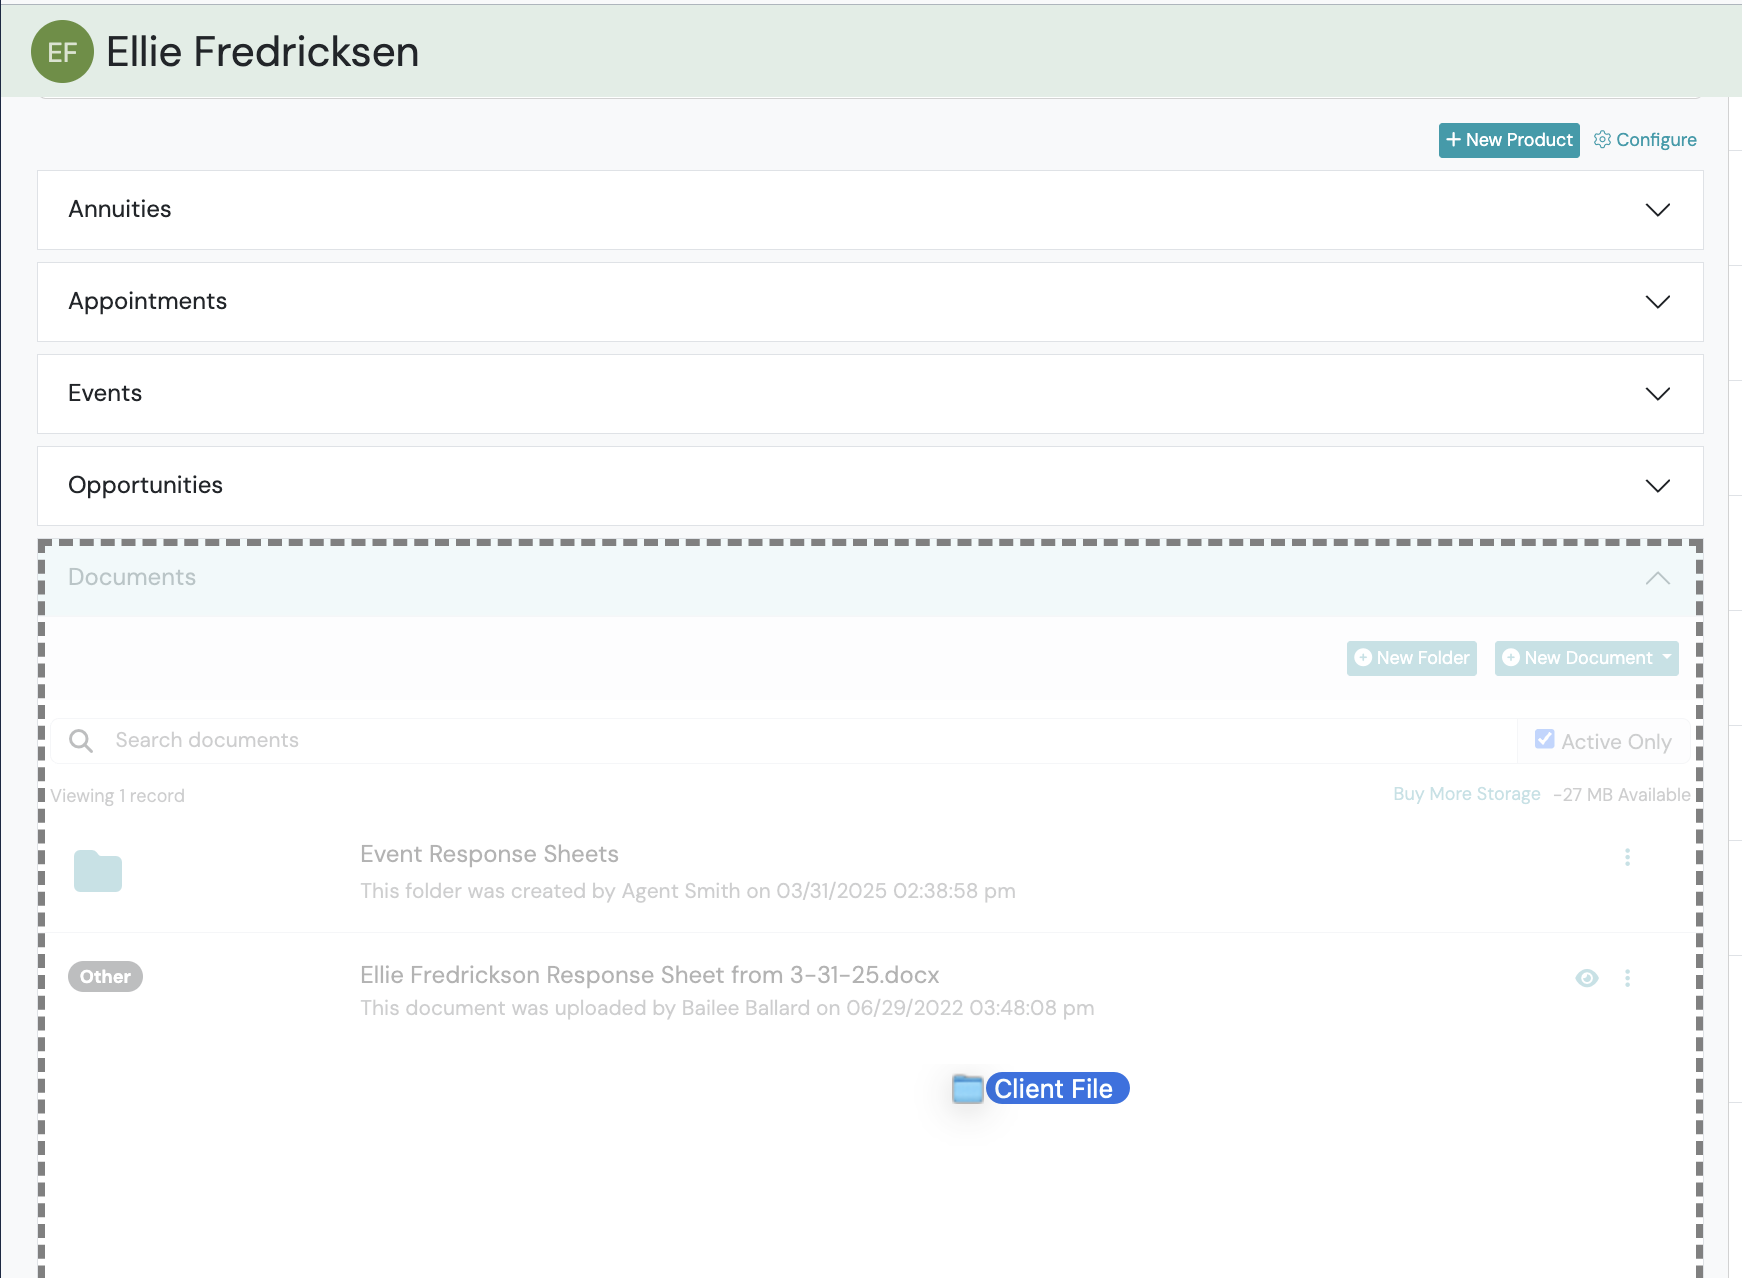
- From your desktop or file organizer on your computer, drag your file or folder until the documents accordion is greyed out showing that you can upload your file.
- Drop your file into Swivel.
Moving Current Documents in Swivel to a Folder
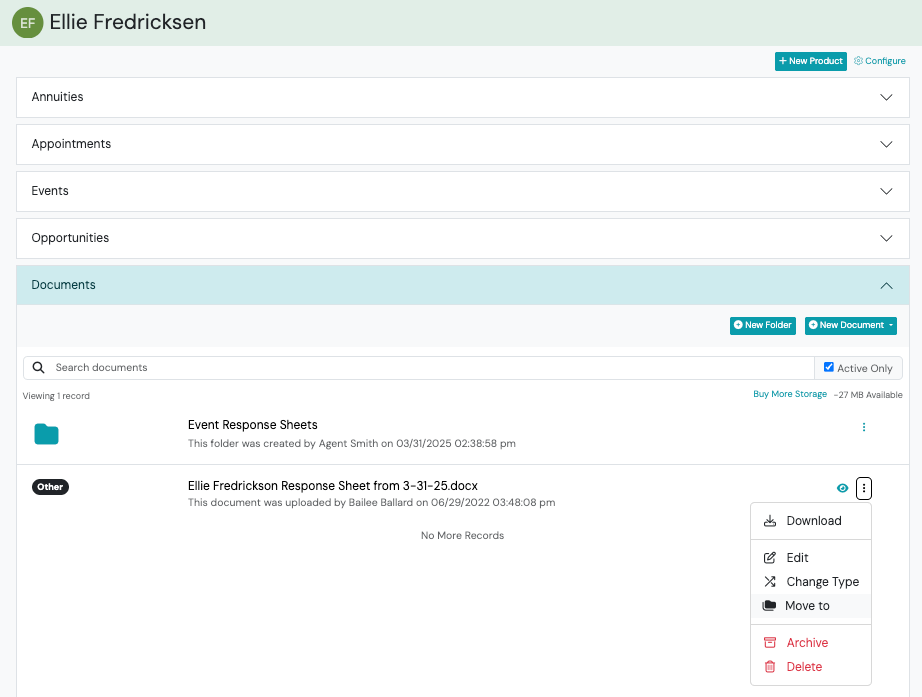
Section titled “Moving Current Documents in Swivel to a Folder”- Navigate to the document you would like to move into a folder and select the Action Menu.
- Select Move To.
- From the drop down, select the folder you would like to move this document to. Select Save.
Managing Documents with “Statement” Type
Section titled “Managing Documents with “Statement” Type”Statements will be managed via the policy and account Documents feature.
- Click +New Document button
- Select Statement type
- Selecting the Statement type will translate to the respective Statements section on the Portfolio Summary view.