Building Pipelines with Sales Stages
Create and Customize Pipelines with Sales Stages
A Pipeline consists of Sales Stages that track your client journey from when an Opportunity is identified to the closing sale.
Swivel comes with a default Sales Pipeline with six distinct Sales Stages: Prospect, Qualify, Analysis, Proposal, Closed Won, and Closed Lost.
Adding a New Pipeline and Configuring Sales Stages from Opportunities Tab (Recommended)
Section titled “Adding a New Pipeline and Configuring Sales Stages from Opportunities Tab (Recommended)”Step 1: Add New Pipeline
Section titled “Step 1: Add New Pipeline”- From the left-side main menu, click the Opportunities tab.
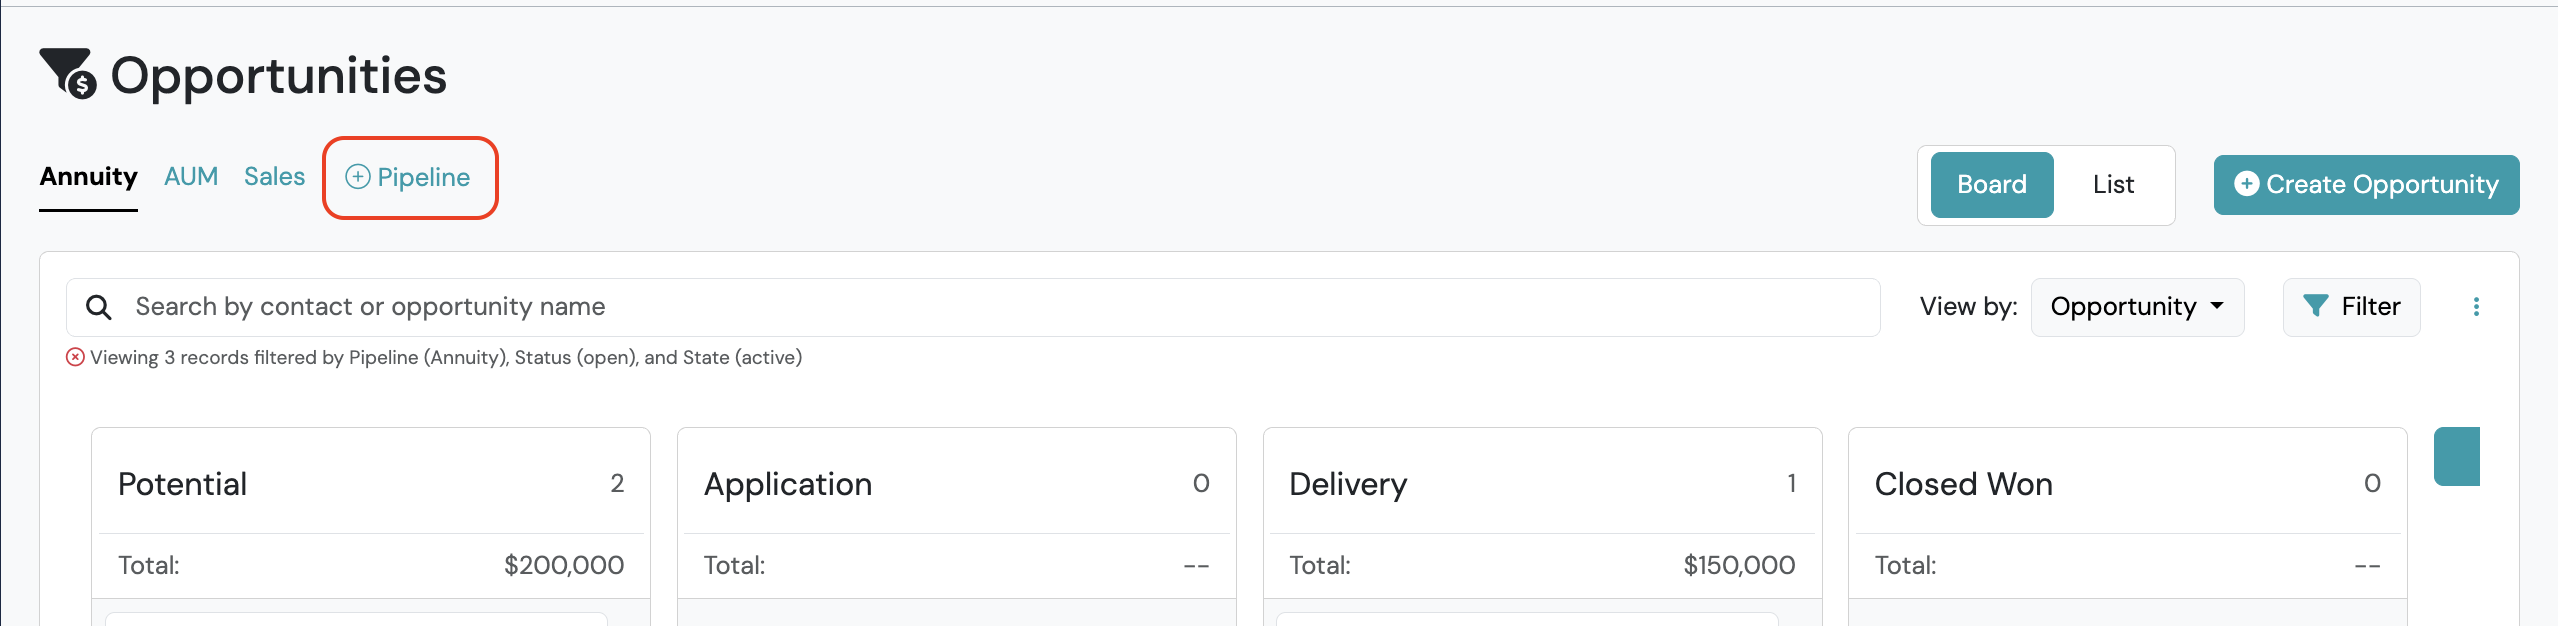
- Click the Pipeline dropdown in the top left of the page.
- Select + Pipeline at the bottom of the dropdown.
- Complete the Name of the new pipeline.
- Click Add.
Step 2: Add Sales Stages
Section titled “Step 2: Add Sales Stages”-
After you have completed Step 1: Add New Pipeline (above), your new pipeline will be created. Be sure for the following steps that you have selected that Pipeline in the list to configure sales stages within the given pipeline
-
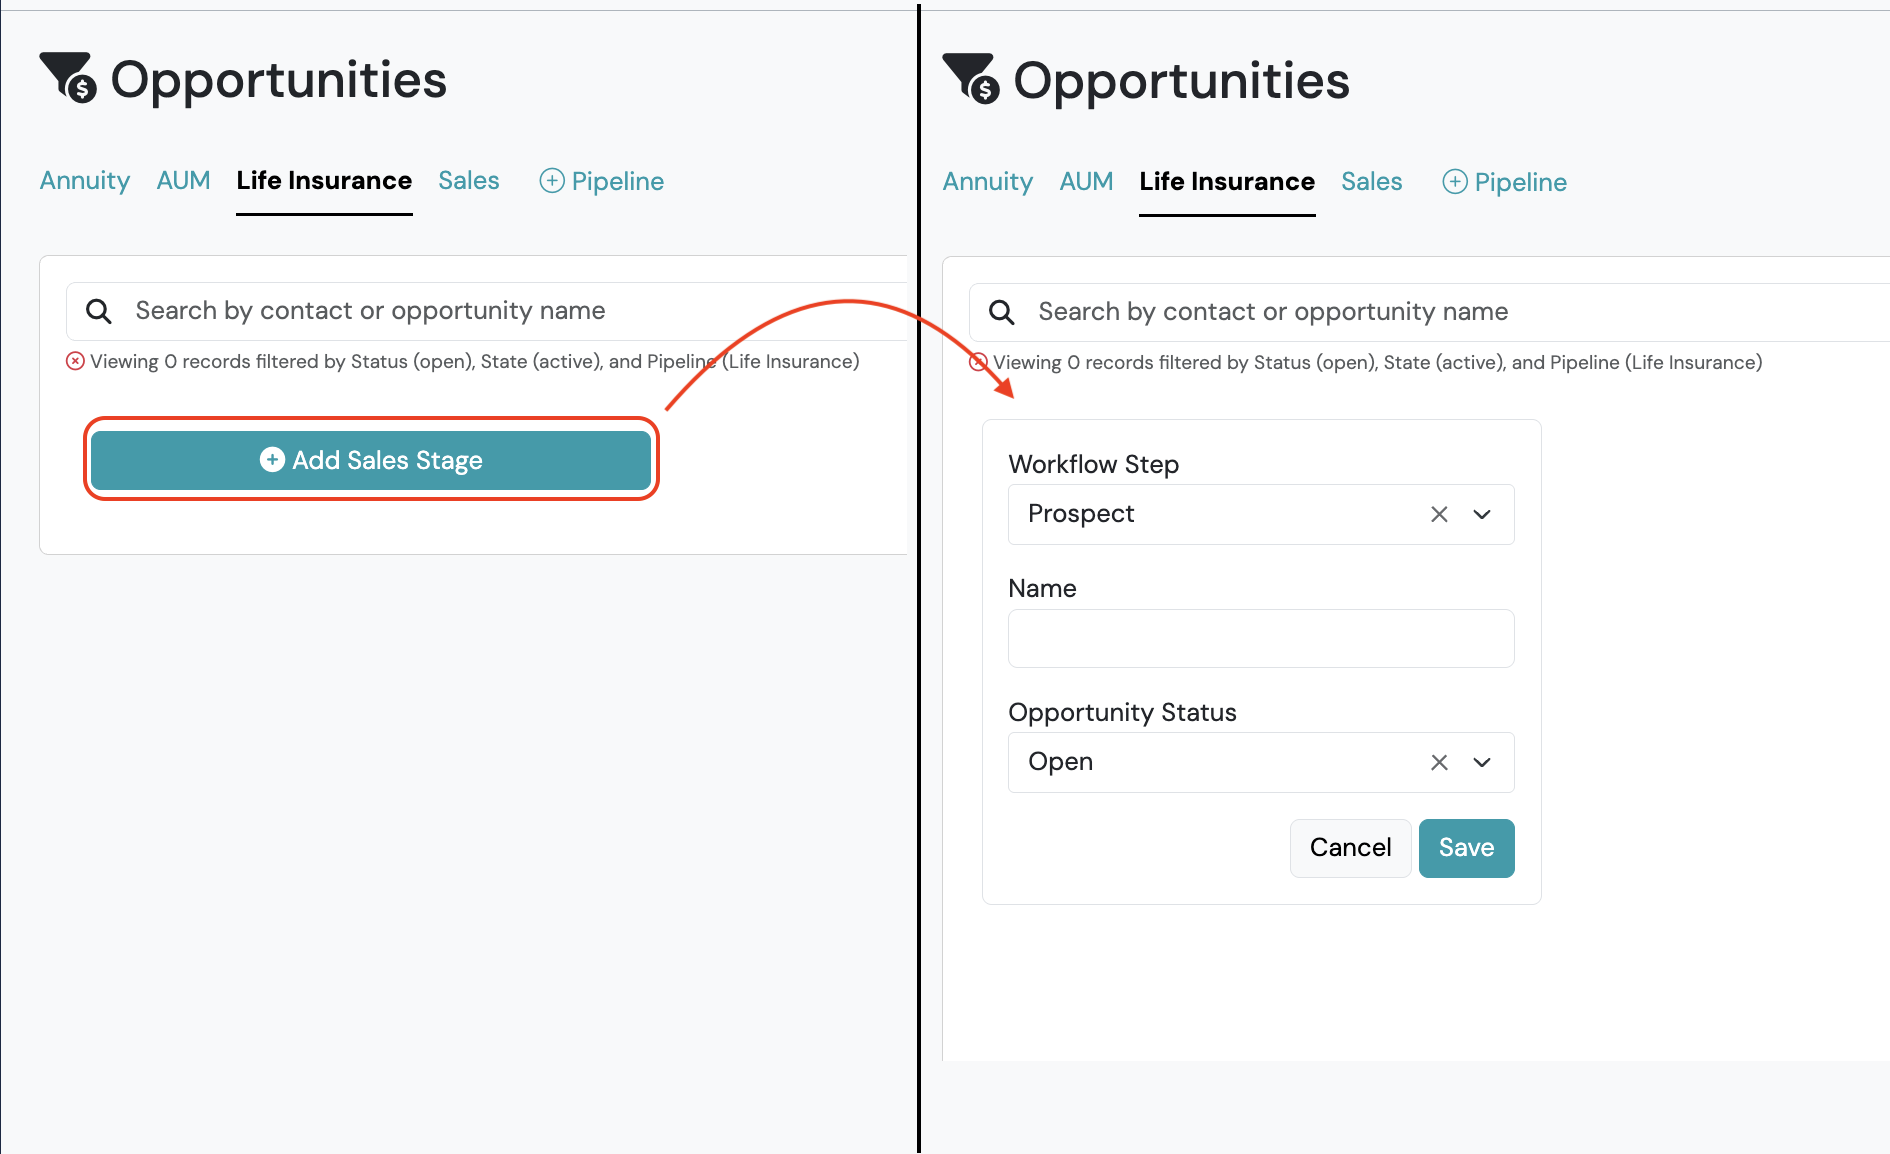
Select the +Add Sales Stage bar
-
Complete the New Sales Stage form.
-
Workflow Step
- The core sales stage step of a given sales stage. Available options are Prospect, Qualify, Review, Won, Lost.
-
Name
- The name of a sales stage.
-
Opportunity Status
- The core sales stage status of a given sales stage. Available options are Open and Closed.
-
Probability (%)
- The likelihood of closing at this sales stage. Auto-fills based on the selected Workflow Step. Editable for Prospect, Qualify, and Review stages. Locked at 100% for Won and 0% for Lost.
-
-
Click Save button.
-
Repeat steps 2 & 3 at any time to add additional sales stages to this pipeline.
Adding a New Pipeline and Configuring Sales Stages from Settings
Section titled “Adding a New Pipeline and Configuring Sales Stages from Settings”Step 1: Add New Pipeline
Section titled “Step 1: Add New Pipeline”-
From the left-side main menu, click the Settings tab.
-
Go to Data Setup section > click Pipelines.
-
Click +New button to create a new pipeline.
-
Complete the New Pipeline slide out form.
- Name
- Description optional
- Manage Custom Fields optional
-
Click Save button.
Step 2: Add Sales Stages
Section titled “Step 2: Add Sales Stages”-
After you have completed Step 1: Add New Pipeline (above), > click the name of the newly created Pipeline to navigate to the Sales Stages builder.
-
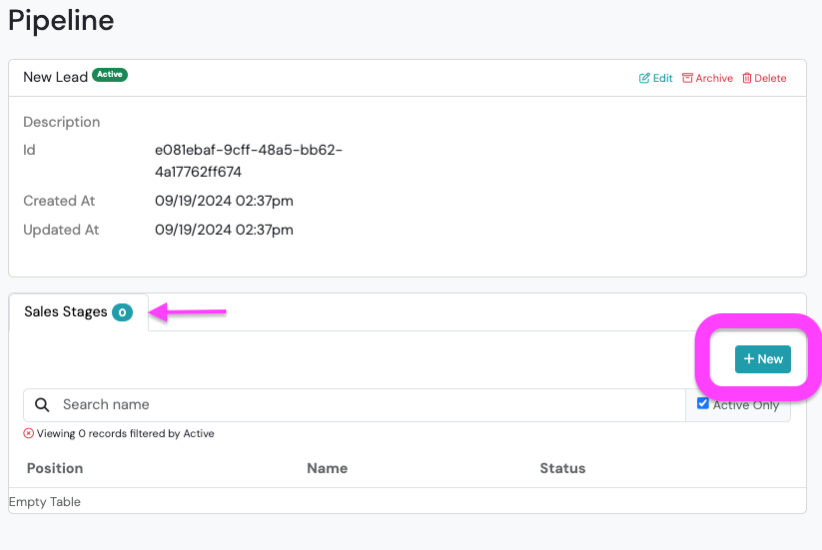
In the Sales Stages tab > click the +New button
-
Complete the New Sales Stage slide out form.
-
Workflow Step
- The core sales stage step of a given sales stage. Available options are Prospect, Qualify, Review, Won, Lost.
-
Name
- The name of a sales stage.
-
Description
-
Position
- The order in which sales stages should display from a drop-down selection menu.
-
Opportunity Status
- The core sales stage status of a given sales stage. Available options are Open and Closed.
-
Probability (%)
- The likelihood of closing at this sales stage. Auto-fills based on the selected Workflow Step. Editable for Prospect, Qualify, and Review stages. Locked at 100% for Won and 0% for Lost.
-
-
Click Save button.
-
Repeat steps 2-4 to add each additional sales stage.
Edit an Existing Pipeline
Section titled “Edit an Existing Pipeline”Change the name of the pipeline
Section titled “Change the name of the pipeline”-
From the left-side main menu, click the Settings tab.
-
Go to Data Setup section > click Pipelines.
-
Click the Pipeline you wish edit
-
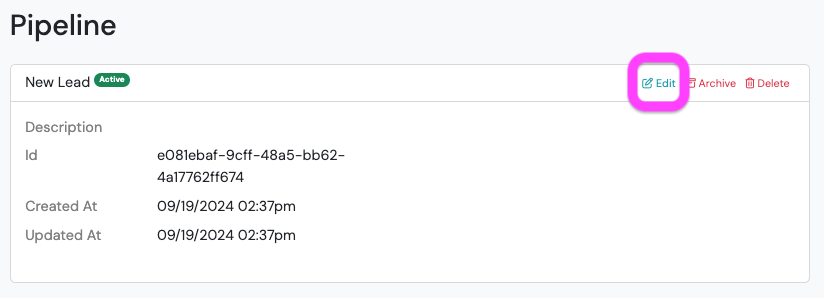
To change the Pipeline’s Name, < click the Edit button.
-
Complete the New Pipeline slide out form.
- Name
- Description optional
- Manage Custom Fields optional
-
Click Save button.
You can also edit or delete a pipeline directly from the Pipeline dropdown on the Opportunities tab. Click the Pipeline dropdown, then hover over the pipeline name you wish to edit or delete. A pencil icon and trash icon will appear on that row. Select the pencil to edit or the trash to delete.
📌 Note: Add, Edit, and Delete pipeline actions are only visible to users with Owner or Manager roles.
Edit Sales Stages
Section titled “Edit Sales Stages”Editing and managing sales stages can be done from both the Opportunity Tab Board View or from Settings. Below explains how to edit sales stages from the Board View.
Change the Order (Position) of Sales Stages
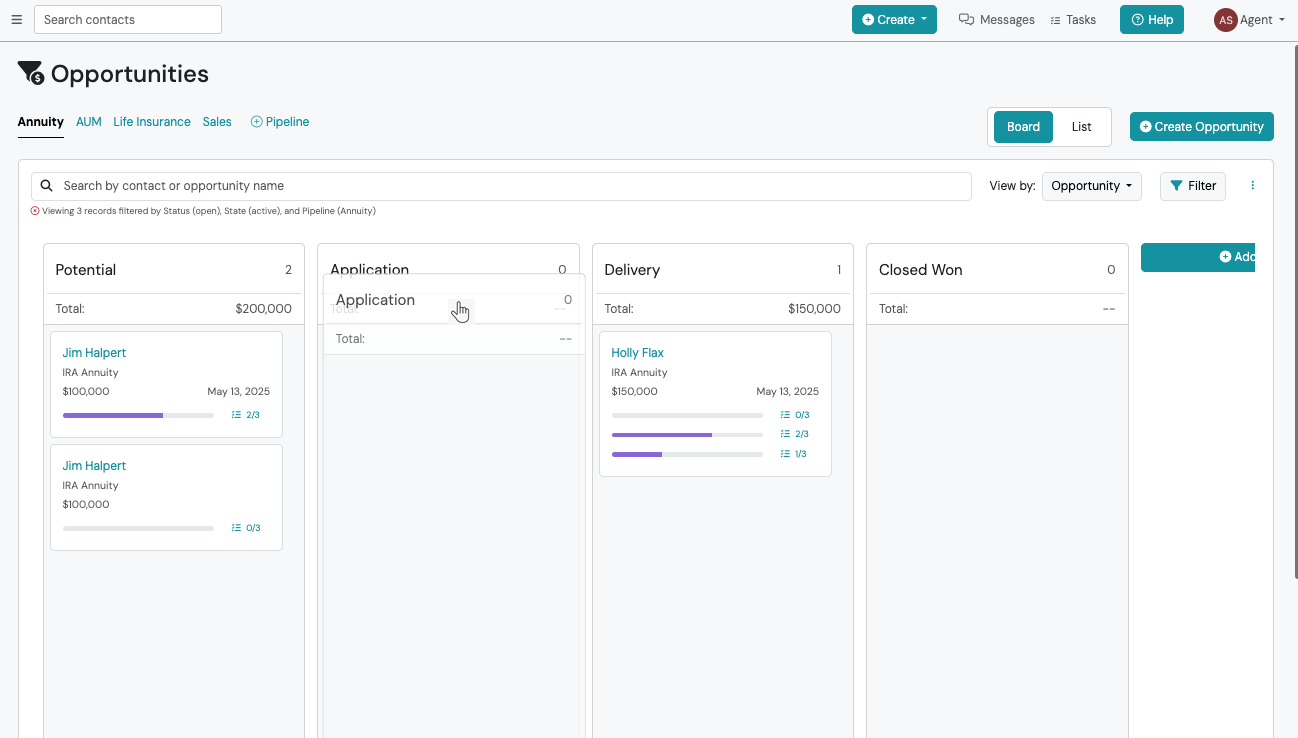
Section titled “Change the Order (Position) of Sales Stages”The Board View allows a user to drag and drop Sales Stages in order to reposition their order. Simply hover over the white space next to the Sales Stage name and select and hold. Drag and move the Sales Stage column in the order you prefer.
Change the Name of Sales Stages
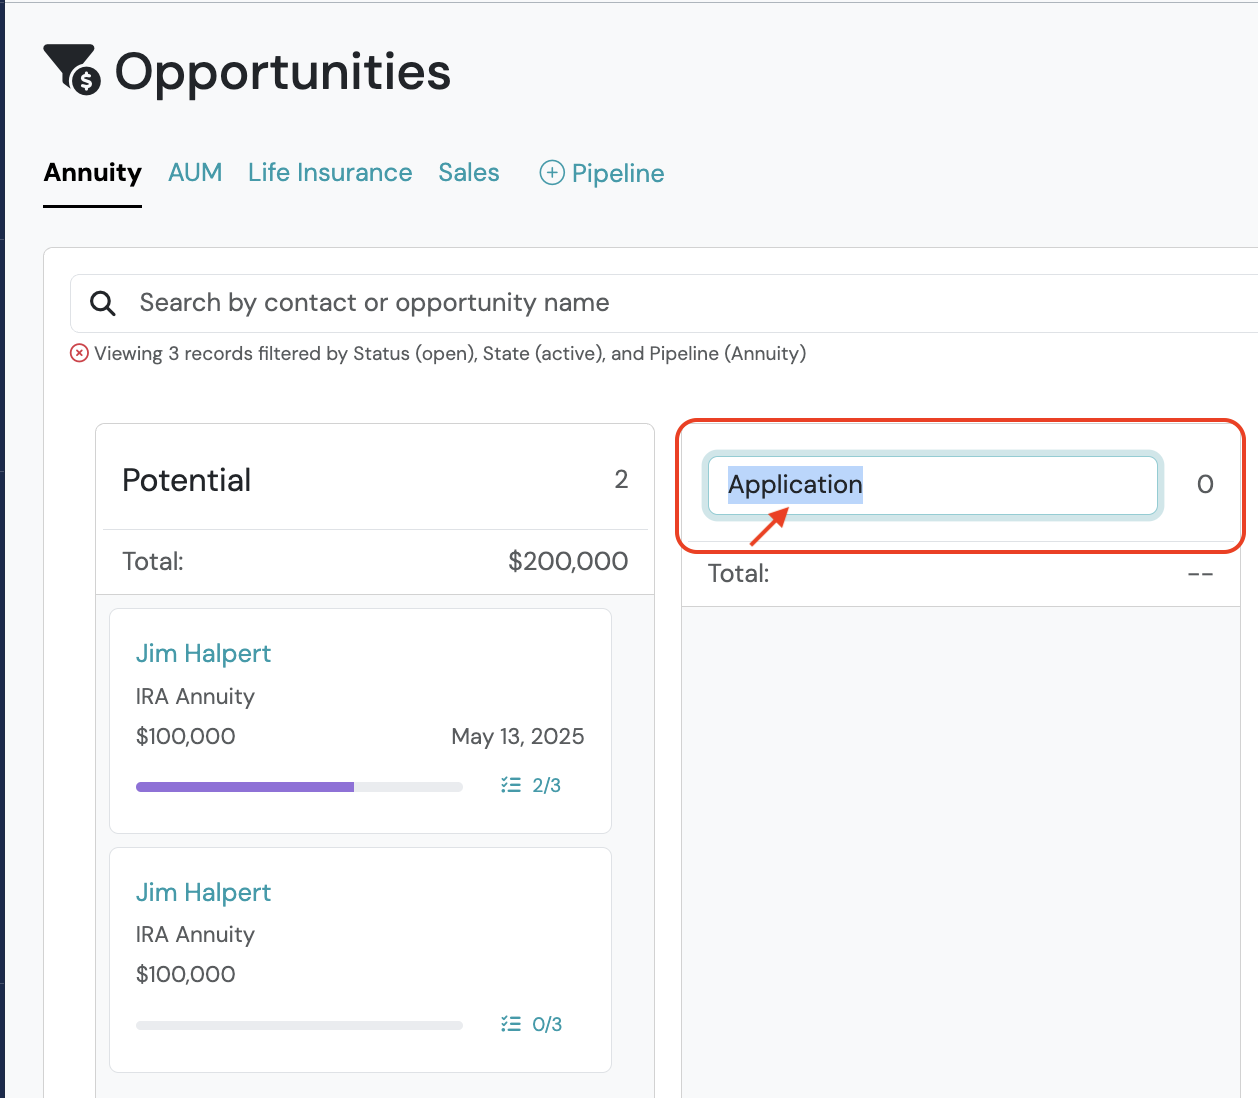
Section titled “Change the Name of Sales Stages”To edit the name of a Sales Stage, simply hover and click on the name of the Sales Stage to open a edit text box to update the name.
Delete a Sales Stage
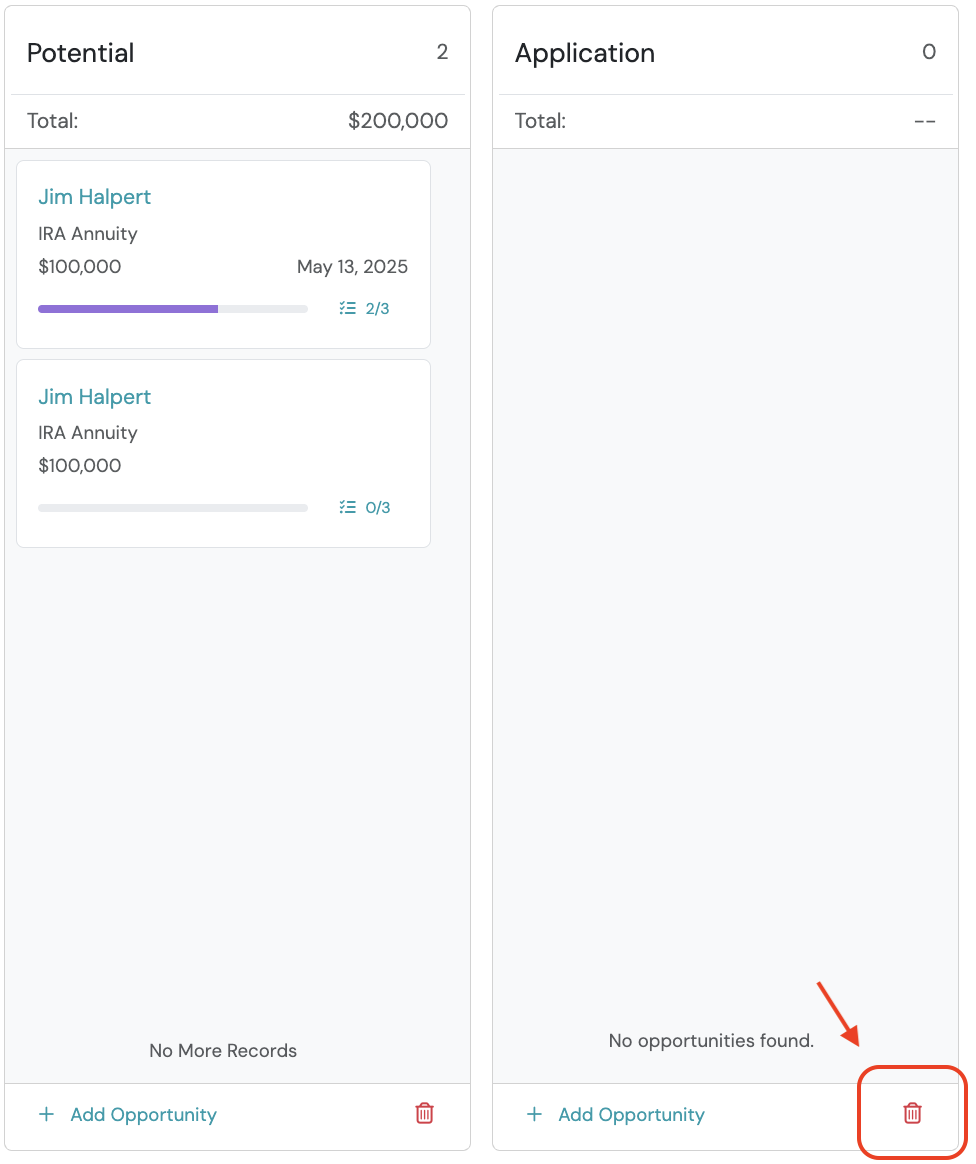
Section titled “Delete a Sales Stage”At the bottom of each listed Sales Stage in a pipeline, you will see the read trash button, select this to delete the sales stage from this pipeline and your account entirely.